NAME
Examples - Excel::Writer::XLSX example programs.
DESCRIPTION
This is a documentation only module showing the examples that are included in the Excel::Writer::XLSX distribution.
This file was auto-generated via the gen_examples_pod.pl program that is also included in the examples directory.
Example programs
The following is a list of the 36 example programs that are included in the Excel::Writer::XLSX distribution.
"Example: a_simple.pl" A simple demo of some of the features.
"Example: bug_report.pl" A template for submitting bug reports.
"Example: demo.pl" A demo of some of the available features.
"Example: formats.pl" All the available formatting on several worksheets.
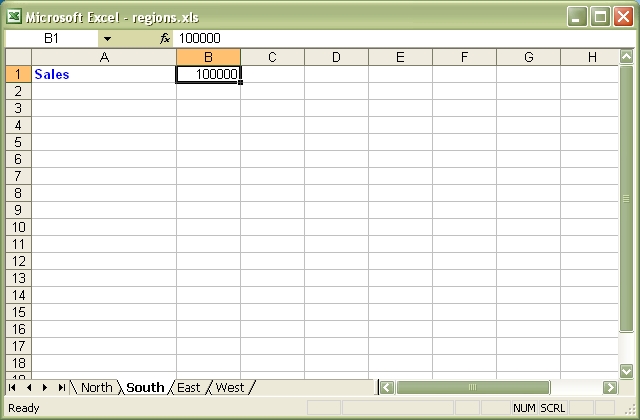
"Example: regions.pl" A simple example of multiple worksheets.
"Example: stats.pl" Basic formulas and functions.
"Example: array_formula.pl" Examples of how to write array formulas.
"Example: cgi.pl" A simple CGI program.
"Example: colors.pl" A demo of the colour palette and named colours.
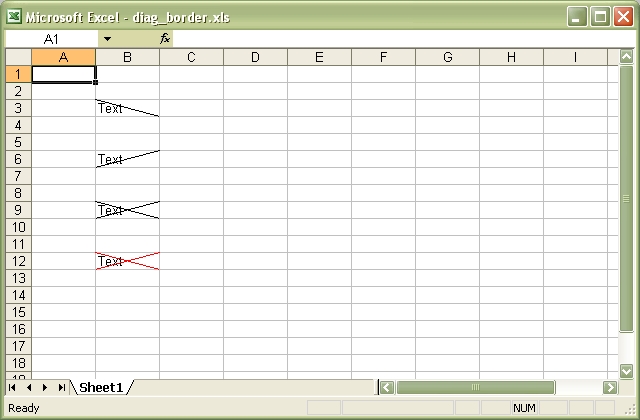
"Example: diag_border.pl" A simple example of diagonal cell borders.
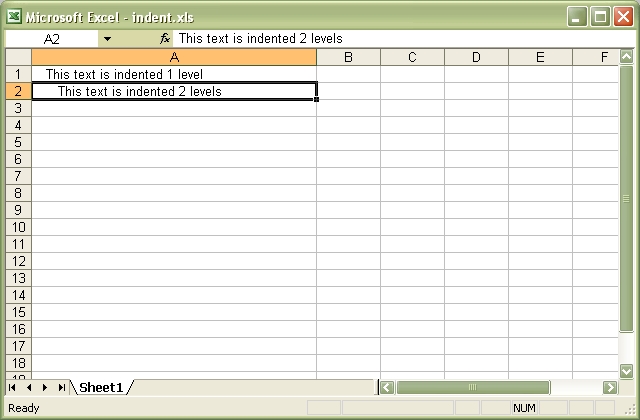
"Example: indent.pl" An example of cell indentation.
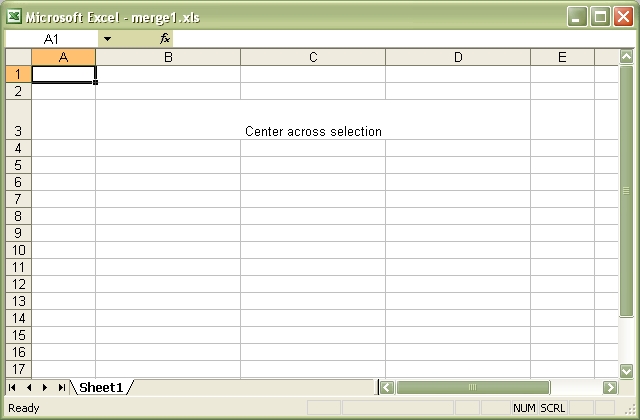
"Example: merge1.pl" A simple example of cell merging.
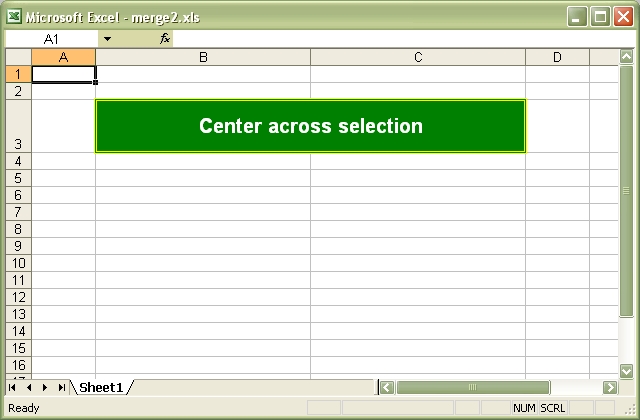
"Example: merge2.pl" A simple example of cell merging with formatting.
"Example: merge3.pl" Add hyperlinks to merged cells.
"Example: merge4.pl" An advanced example of merging with formatting.
"Example: merge5.pl" An advanced example of merging with formatting.
"Example: merge6.pl" An example of merging with Unicode strings.
"Example: mod_perl1.pl" A simple mod_perl 1 program.
"Example: mod_perl2.pl" A simple mod_perl 2 program.
"Example: sales.pl" An example of a simple sales spreadsheet.
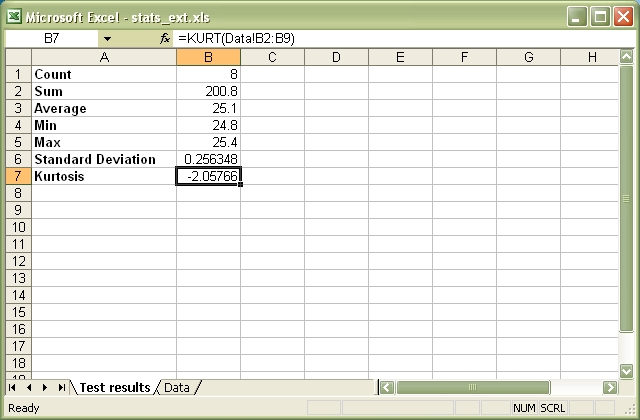
"Example: stats_ext.pl" Same as stats.pl with external references.
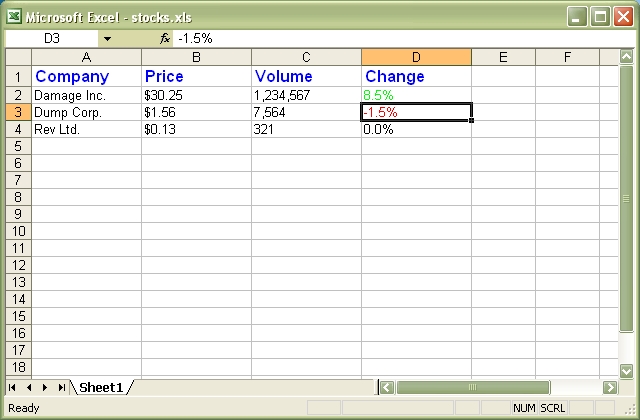
"Example: stocks.pl" Demonstrates conditional formatting.
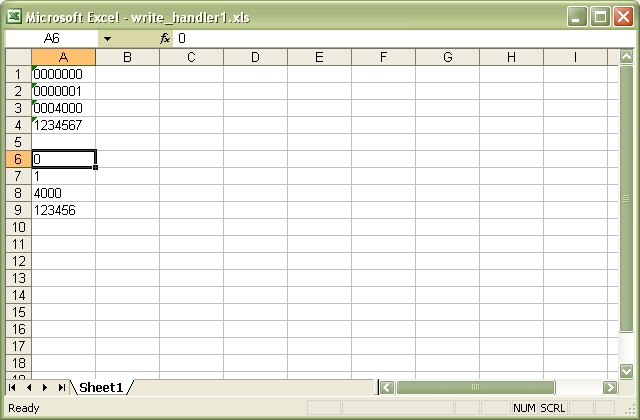
"Example: write_handler1.pl" Example of extending the write() method. Step 1.
"Example: write_handler2.pl" Example of extending the write() method. Step 2.
"Example: write_handler3.pl" Example of extending the write() method. Step 3.
"Example: write_handler4.pl" Example of extending the write() method. Step 4.
"Example: unicode_2022_jp.pl" Japanese: ISO-2022-JP.
"Example: unicode_8859_11.pl" Thai: ISO-8859_11.
"Example: unicode_8859_7.pl" Greek: ISO-8859_7.
"Example: unicode_big5.pl" Chinese: BIG5.
"Example: unicode_cp1251.pl" Russian: CP1251.
"Example: unicode_cp1256.pl" Arabic: CP1256.
"Example: unicode_cyrillic.pl" Russian: Cyrillic.
"Example: unicode_koi8r.pl" Russian: KOI8-R.
"Example: unicode_polish_utf8.pl" Polish : UTF8.
"Example: unicode_shift_jis.pl" Japanese: Shift JIS.
Example: a_simple.pl
A simple example of how to use the Excel::Writer::XLSX module to write text and numbers to an Excel xlsx file.
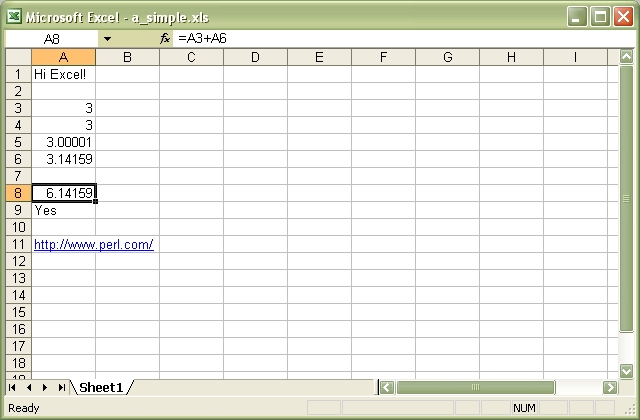
Source code for this example:
#!/usr/bin/perl -w

#######################################################################
#
# A simple example of how to use the Excel::Writer::XLSX module to
# write text and numbers to an Excel xlsx file.
#
# reverse('©'), March 2001, John McNamara, jmcnamara@cpan.org
#

use strict;
use Excel::Writer::XLSX;

# Create a new workbook called simple.xls and add a worksheet
my $workbook = Excel::Writer::XLSX->new( 'a_simple.xlsx' );

die "Couldn't create new Excel file: $!.\n" unless defined $workbook;

my $worksheet = $workbook->add_worksheet();

# The general syntax is write($row, $column, $token). Note that row and
# column are zero indexed
#

# Write some text
$worksheet->write( 0, 0, "Hi Excel!" );


# Write some numbers
$worksheet->write( 2, 0, 3 );          # Writes 3
$worksheet->write( 3, 0, 3.00000 );    # Writes 3
$worksheet->write( 4, 0, 3.00001 );    # Writes 3.00001
$worksheet->write( 5, 0, 3.14159 );    # TeX revision no.?


# Write some formulas
$worksheet->write(7, 0,  '=A3 + A6');
$worksheet->write(8, 0,  '=IF(A5>3,"Yes", "No")');


# Write a hyperlink
#$worksheet->write(10, 0, 'http://www.perl.com/');

__END__
Download this example: http://cpansearch.perl.org/src/JMCNAMARA/Excel-Writer-XLSX-0.05/examples/a_simple.pl
Example: bug_report.pl
A template for submitting a bug report.
Run this program and read the output from the command line.
#!/usr/bin/perl -w

###############################################################################
#
# A template for submitting a bug report.
#
# Run this program and read the output from the command line.
#
# reverse('©'), March 2004, John McNamara, jmcnamara@cpan.org
#


use strict;

print << 'HINTS_1';

REPORTING A BUG OR ASKING A QUESTION

    Feel free to report bugs or ask questions. However, to save time
    consider the following steps first:

    Read the documentation:

        The Excel::Writer::XLSX documentation has been refined in
        response to user questions. Therefore, if you have a question it is
        possible that someone else has asked it before you and that it is
        already addressed in the documentation. Since there is a lot of
        documentation to get through you should at least read the table of
        contents and search for keywords that you are interested in.

    Look at the example programs:

        There are over 40 example programs shipped with the standard
        Excel::Writer::XLSX distribution. Many of these were created
        in response to user questions. Try to identify an example program
        that corresponds to your query and adapt it to your needs.

HINTS_1
print "Press enter ..."; <STDIN>;

print << 'HINTS_2';

    If you submit a bug report here are some pointers.

    1.  Put "WriteExcelXML:" at the beginning of the subject line. This helps
        to filter genuine messages from spam.

    2.  Describe the problems as clearly and as concisely as possible.

    3.  Send a sample program. It is often easier to describe a problem in
        code than in written prose.

    4.  The sample program should be as small as possible to demonstrate the
        problem. Don't copy and past large sections of your program. The
        program should also be self contained and working.

    A sample bug report is generated below. If you use this format then it
    will help to analyse your question and respond to it more quickly.

    Please don't send patches without contacting the author first.


HINTS_2
print "Press enter ..."; <STDIN>;


print << 'EMAIL';

=======================================================================

To:      John McNamara <jmcnamara@cpan.org>
Subject: WriteExcelXML: Problem with something.

Hi John,

I am using Excel::Writer::XLSX and I have encountered a problem. I
want it to do SOMETHING but the module appears to do SOMETHING_ELSE.

Here is some code that demonstrates the problem.

    #!/usr/bin/perl -w

    use strict;
    use Excel::Writer::XLSX;

    my $workbook  = Excel::Writer::XLSX->new("reload.xls");
    my $worksheet = $workbook->addworksheet();

    $worksheet->write(0, 0, "Hi Excel!");

    __END__

My automatically generated system details are as follows:
EMAIL


print "\n    Perl version   : $]";
print "\n    OS name        : $^O";
print "\n    Module versions: (not all are required)\n";


my @modules = qw(
                  Excel::Writer::XLSX
                  Spreadsheet::WriteExcel
                  Archive::Zip
                  XML::Writer
                  IO::File
                  File::Temp
                );


for my $module (@modules) {
    my $version;
    eval "require $module";

    if (not $@) {
        $version = $module->VERSION;
        $version = '(unknown)' if not defined $version;
    }
    else {
        $version = '(not installed)';
    }

    printf "%21s%-24s\t%s\n", "", $module, $version;
}


print << "BYE";
Yours etc.,

A. Person
--

BYE

__END__
Download this example: http://cpansearch.perl.org/src/JMCNAMARA/Excel-Writer-XLSX-0.05/examples/bug_report.pl
Example: demo.pl
A simple demo of some of the features of Excel::Writer::XLSX.
This program is used to create the project screenshot for Freshmeat: http://freshmeat.net/projects/writeexcel/

Source code for this example:
#!/usr/bin/perl -w

#######################################################################
#
# A simple demo of some of the features of Excel::Writer::XLSX.
#
# This program is used to create the project screenshot for Freshmeat:
# L<http://freshmeat.net/projects/writeexcel/>
#
# reverse('©'), October 2001, John McNamara, jmcnamara@cpan.org
#

use strict;
use Excel::Writer::XLSX;

my $workbook   = Excel::Writer::XLSX->new( 'demo.xlsx' );
my $worksheet  = $workbook->add_worksheet( 'Demo' );
my $worksheet2 = $workbook->add_worksheet( 'Another sheet' );
my $worksheet3 = $workbook->add_worksheet( 'And another' );

my $bold = $workbook->add_format( bold => 1 );


#######################################################################
#
# Write a general heading
#
$worksheet->set_column( 'A:A', 36, $bold );
$worksheet->set_column( 'B:B', 20 );
$worksheet->set_row( 0, 40 );

my $heading = $workbook->add_format(
    bold  => 1,
    color => 'blue',
    size  => 16,
    merge => 1,
    align => 'vcenter',
);

my @headings = ( 'Features of Excel::Writer::XLSX', '' );
$worksheet->write_row( 'A1', \@headings, $heading );


#######################################################################
#
# Some text examples
#
my $text_format = $workbook->add_format(
    bold   => 1,
    italic => 1,
    color  => 'red',
    size   => 18,
    font   => 'Lucida Calligraphy'
);

# A phrase in Cyrillic
my $unicode = pack "H*", "042d0442043e002004440440043004370430002004"
  . "3d043000200440044304410441043a043e043c0021";


$worksheet->write( 'A2', "Text" );
$worksheet->write( 'B2', "Hello Excel" );
$worksheet->write( 'A3', "Formatted text" );
$worksheet->write( 'B3', "Hello Excel", $text_format );
$worksheet->write( 'A4', "Unicode text" );
$worksheet->write_utf16be_string( 'B4', $unicode );

#######################################################################
#
# Some numeric examples
#
my $num1_format = $workbook->add_format( num_format => '$#,##0.00' );
my $num2_format = $workbook->add_format( num_format => ' d mmmm yyy' );


$worksheet->write( 'A5', "Numbers" );
$worksheet->write( 'B5', 1234.56 );
$worksheet->write( 'A6', "Formatted numbers" );
$worksheet->write( 'B6', 1234.56, $num1_format );
$worksheet->write( 'A7', "Formatted numbers" );
$worksheet->write( 'B7', 37257, $num2_format );


#######################################################################
#
# Formulae
#
$worksheet->set_selection( 'B8' );
$worksheet->write( 'A8', 'Formulas and functions, "=SIN(PI()/4)"' );
$worksheet->write( 'B8', '=SIN(PI()/4)' );


#######################################################################
#
# Hyperlinks
#
$worksheet->write( 'A9', "Hyperlinks" );
$worksheet->write( 'B9', 'http://www.perl.com/' );


#######################################################################
#
# Images
#
$worksheet->write( 'A10', "Images" );
$worksheet->insert_image( 'B10', 'republic.png', 16, 8 );


#######################################################################
#
# Misc
#
$worksheet->write( 'A18', "Page/printer setup" );
$worksheet->write( 'A19', "Multiple worksheets" );

__END__
Download this example: http://cpansearch.perl.org/src/JMCNAMARA/Excel-Writer-XLSX-0.05/examples/demo.pl
Example: formats.pl
Examples of formatting using the Excel::Writer::XLSX module.
This program demonstrates almost all possible formatting options. It is worth running this program and viewing the output Excel file if you are interested in the various formatting possibilities.
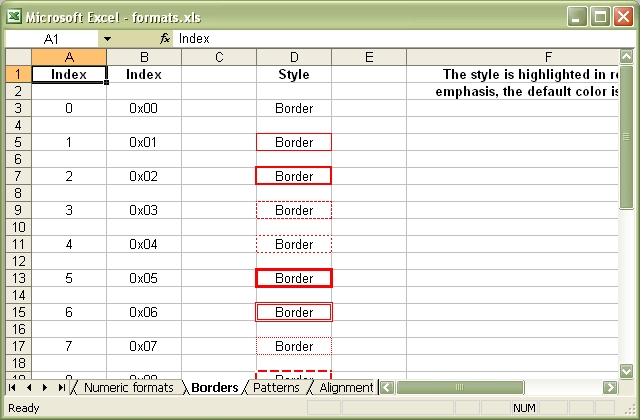
Source code for this example:
#!/usr/bin/perl -w

###############################################################################
#
# Examples of formatting using the Excel::Writer::XLSX module.
#
# This program demonstrates almost all possible formatting options. It is worth
# running this program and viewing the output Excel file if you are interested
# in the various formatting possibilities.
#
# reverse('©'), September 2002, John McNamara, jmcnamara@cpan.org
#

use strict;
use Excel::Writer::XLSX;

my $workbook = Excel::Writer::XLSX->new( 'formats.xlsx' );

# Some common formats
my $center = $workbook->add_format( align => 'center' );
my $heading = $workbook->add_format( align => 'center', bold => 1 );

# The named colors
my %colors = (
    0x08, 'black',
    0x0C, 'blue',
    0x10, 'brown',
    0x0F, 'cyan',
    0x17, 'gray',
    0x11, 'green',
    0x0B, 'lime',
    0x0E, 'magenta',
    0x12, 'navy',
    0x35, 'orange',
    0x21, 'pink',
    0x14, 'purple',
    0x0A, 'red',
    0x16, 'silver',
    0x09, 'white',
    0x0D, 'yellow',

);

# Call these subroutines to demonstrate different formatting options
intro();
fonts();
named_colors();
standard_colors();
numeric_formats();
borders();
patterns();
alignment();
misc();

# Note: this is required
$workbook->close();


######################################################################
#
# Intro.
#
sub intro {

    my $worksheet = $workbook->add_worksheet( 'Introduction' );

    $worksheet->set_column( 0, 0, 60 );

    my $format = $workbook->add_format();
    $format->set_bold();
    $format->set_size( 14 );
    $format->set_color( 'blue' );
    $format->set_align( 'center' );

    my $format2 = $workbook->add_format();
    $format2->set_bold();
    $format2->set_color( 'blue' );

    $worksheet->write( 2, 0, 'This workbook demonstrates some of', $format );
    $worksheet->write( 3, 0, 'the formatting options provided by', $format );
    $worksheet->write( 4, 0, 'the Excel::Writer::XLSX module.',    $format );

    $worksheet->write( 'A7', 'Sections:',                  $format2 );
    $worksheet->write( 'A8', "internal:Fonts!A1",          'Fonts' );
    $worksheet->write( 'A9', "internal:'Named colors'!A1", 'Named colors' );
    $worksheet->write(
        'A10',
        "internal:'Standard colors'!A1",
        'Standard colors'
    );
    $worksheet->write(
        'A11',
        "internal:'Numeric formats'!A1",
        'Numeric formats'
    );
    $worksheet->write( 'A12', "internal:Borders!A1",       'Borders' );
    $worksheet->write( 'A13', "internal:Patterns!A1",      'Patterns' );
    $worksheet->write( 'A14', "internal:Alignment!A1",     'Alignment' );
    $worksheet->write( 'A15', "internal:Miscellaneous!A1", 'Miscellaneous' );

}


######################################################################
#
# Demonstrate the named colors.
#
sub named_colors {

    my $worksheet = $workbook->add_worksheet( 'Named colors' );

    $worksheet->set_column( 0, 3, 15 );

    $worksheet->write( 0, 0, "Index", $heading );
    $worksheet->write( 0, 1, "Index", $heading );
    $worksheet->write( 0, 2, "Name",  $heading );
    $worksheet->write( 0, 3, "Color", $heading );

    my $i = 1;

    while ( my ( $index, $color ) = each %colors ) {
        my $format = $workbook->add_format(
            bg_color => $color,
            pattern  => 1,
            border   => 1
        );

        $worksheet->write( $i + 1, 0, $index, $center );
        $worksheet->write( $i + 1, 1, sprintf( "0x%02X", $index ), $center );
        $worksheet->write( $i + 1, 2, $color, $center );
        $worksheet->write( $i + 1, 3, '',     $format );
        $i++;
    }
}


######################################################################
#
# Demonstrate the standard Excel colors in the range 8..63.
#
sub standard_colors {

    my $worksheet = $workbook->add_worksheet( 'Standard colors' );

    $worksheet->set_column( 0, 3, 15 );

    $worksheet->write( 0, 0, "Index", $heading );
    $worksheet->write( 0, 1, "Index", $heading );
    $worksheet->write( 0, 2, "Color", $heading );
    $worksheet->write( 0, 3, "Name",  $heading );

    for my $i ( 8 .. 63 ) {
        my $format = $workbook->add_format(
            bg_color => $i,
            pattern  => 1,
            border   => 1
        );

        $worksheet->write( ( $i - 7 ), 0, $i, $center );
        $worksheet->write( ( $i - 7 ), 1, sprintf( "0x%02X", $i ), $center );
        $worksheet->write( ( $i - 7 ), 2, '', $format );

        # Add the  color names
        if ( exists $colors{$i} ) {
            $worksheet->write( ( $i - 7 ), 3, $colors{$i}, $center );

        }
    }
}


######################################################################
#
# Demonstrate the standard numeric formats.
#
sub numeric_formats {

    my $worksheet = $workbook->add_worksheet( 'Numeric formats' );

    $worksheet->set_column( 0, 4, 15 );
    $worksheet->set_column( 5, 5, 45 );

    $worksheet->write( 0, 0, "Index",       $heading );
    $worksheet->write( 0, 1, "Index",       $heading );
    $worksheet->write( 0, 2, "Unformatted", $heading );
    $worksheet->write( 0, 3, "Formatted",   $heading );
    $worksheet->write( 0, 4, "Negative",    $heading );
    $worksheet->write( 0, 5, "Format",      $heading );

    #<<<
    my @formats;
    push @formats, [ 0x00, 1234.567,   0,         'General' ];
    push @formats, [ 0x01, 1234.567,   0,         '0' ];
    push @formats, [ 0x02, 1234.567,   0,         '0.00' ];
    push @formats, [ 0x03, 1234.567,   0,         '#,##0' ];
    push @formats, [ 0x04, 1234.567,   0,         '#,##0.00' ];
    push @formats, [ 0x05, 1234.567,   -1234.567, '($#,##0_);($#,##0)' ];
    push @formats, [ 0x06, 1234.567,   -1234.567, '($#,##0_);[Red]($#,##0)' ];
    push @formats, [ 0x07, 1234.567,   -1234.567, '($#,##0.00_);($#,##0.00)' ];
    push @formats, [ 0x08, 1234.567,   -1234.567, '($#,##0.00_);[Red]($#,##0.00)' ];
    push @formats, [ 0x09, 0.567,      0,         '0%' ];
    push @formats, [ 0x0a, 0.567,      0,         '0.00%' ];
    push @formats, [ 0x0b, 1234.567,   0,         '0.00E+00' ];
    push @formats, [ 0x0c, 0.75,       0,         '# ?/?' ];
    push @formats, [ 0x0d, 0.3125,     0,         '# ??/??' ];
    push @formats, [ 0x0e, 36892.521,  0,         'm/d/yy' ];
    push @formats, [ 0x0f, 36892.521,  0,         'd-mmm-yy' ];
    push @formats, [ 0x10, 36892.521,  0,         'd-mmm' ];
    push @formats, [ 0x11, 36892.521,  0,         'mmm-yy' ];
    push @formats, [ 0x12, 36892.521,  0,         'h:mm AM/PM' ];
    push @formats, [ 0x13, 36892.521,  0,         'h:mm:ss AM/PM' ];
    push @formats, [ 0x14, 36892.521,  0,         'h:mm' ];
    push @formats, [ 0x15, 36892.521,  0,         'h:mm:ss' ];
    push @formats, [ 0x16, 36892.521,  0,         'm/d/yy h:mm' ];
    push @formats, [ 0x25, 1234.567,   -1234.567, '(#,##0_);(#,##0)' ];
    push @formats, [ 0x26, 1234.567,   -1234.567, '(#,##0_);[Red](#,##0)' ];
    push @formats, [ 0x27, 1234.567,   -1234.567, '(#,##0.00_);(#,##0.00)' ];
    push @formats, [ 0x28, 1234.567,   -1234.567, '(#,##0.00_);[Red](#,##0.00)' ];
    push @formats, [ 0x29, 1234.567,   -1234.567, '_(* #,##0_);_(* (#,##0);_(* "-"_);_(@_)' ];
    push @formats, [ 0x2a, 1234.567,   -1234.567, '_($* #,##0_);_($* (#,##0);_($* "-"_);_(@_)' ];
    push @formats, [ 0x2b, 1234.567,   -1234.567, '_(* #,##0.00_);_(* (#,##0.00);_(* "-"??_);_(@_)' ];
    push @formats, [ 0x2c, 1234.567,   -1234.567, '_($* #,##0.00_);_($* (#,##0.00);_($* "-"??_);_(@_)' ];
    push @formats, [ 0x2d, 36892.521,  0,         'mm:ss' ];
    push @formats, [ 0x2e, 3.0153,     0,         '[h]:mm:ss' ];
    push @formats, [ 0x2f, 36892.521,  0,         'mm:ss.0' ];
    push @formats, [ 0x30, 1234.567,   0,         '##0.0E+0' ];
    push @formats, [ 0x31, 1234.567,   0,         '@' ];
    #>>>

    my $i;
    foreach my $format ( @formats ) {
        my $style = $workbook->add_format();
        $style->set_num_format( $format->[0] );

        $i++;
        $worksheet->write( $i, 0, $format->[0], $center );
        $worksheet->write( $i, 1, sprintf( "0x%02X", $format->[0] ), $center );
        $worksheet->write( $i, 2, $format->[1], $center );
        $worksheet->write( $i, 3, $format->[1], $style );

        if ( $format->[2] ) {
            $worksheet->write( $i, 4, $format->[2], $style );
        }

        $worksheet->write_string( $i, 5, $format->[3] );
    }
}


######################################################################
#
# Demonstrate the font options.
#
sub fonts {

    my $worksheet = $workbook->add_worksheet( 'Fonts' );

    $worksheet->set_column( 0, 0, 30 );
    $worksheet->set_column( 1, 1, 10 );

    $worksheet->write( 0, 0, "Font name", $heading );
    $worksheet->write( 0, 1, "Font size", $heading );

    my @fonts;
    push @fonts, [ 10, 'Arial' ];
    push @fonts, [ 12, 'Arial' ];
    push @fonts, [ 14, 'Arial' ];
    push @fonts, [ 12, 'Arial Black' ];
    push @fonts, [ 12, 'Arial Narrow' ];
    push @fonts, [ 12, 'Century Schoolbook' ];
    push @fonts, [ 12, 'Courier' ];
    push @fonts, [ 12, 'Courier New' ];
    push @fonts, [ 12, 'Garamond' ];
    push @fonts, [ 12, 'Impact' ];
    push @fonts, [ 12, 'Lucida Handwriting' ];
    push @fonts, [ 12, 'Times New Roman' ];
    push @fonts, [ 12, 'Symbol' ];
    push @fonts, [ 12, 'Wingdings' ];
    push @fonts, [ 12, 'A font that doesn\'t exist' ];

    my $i;
    foreach my $font ( @fonts ) {
        my $format = $workbook->add_format();

        $format->set_size( $font->[0] );
        $format->set_font( $font->[1] );

        $i++;
        $worksheet->write( $i, 0, $font->[1], $format );
        $worksheet->write( $i, 1, $font->[0], $format );
    }

}


######################################################################
#
# Demonstrate the standard Excel border styles.
#
sub borders {

    my $worksheet = $workbook->add_worksheet( 'Borders' );

    $worksheet->set_column( 0, 4, 10 );
    $worksheet->set_column( 5, 5, 40 );

    $worksheet->write( 0, 0, "Index",                                $heading );
    $worksheet->write( 0, 1, "Index",                                $heading );
    $worksheet->write( 0, 3, "Style",                                $heading );
    $worksheet->write( 0, 5, "The style is highlighted in red for ", $heading );
    $worksheet->write( 1, 5, "emphasis, the default color is black.",
        $heading );

    for my $i ( 0 .. 13 ) {
        my $format = $workbook->add_format();
        $format->set_border( $i );
        $format->set_border_color( 'red' );
        $format->set_align( 'center' );

        $worksheet->write( ( 2 * ( $i + 1 ) ), 0, $i, $center );
        $worksheet->write( ( 2 * ( $i + 1 ) ),
            1, sprintf( "0x%02X", $i ), $center );

        $worksheet->write( ( 2 * ( $i + 1 ) ), 3, "Border", $format );
    }

    $worksheet->write( 30, 0, "Diag type",             $heading );
    $worksheet->write( 30, 1, "Index",                 $heading );
    $worksheet->write( 30, 3, "Style",                 $heading );
    $worksheet->write( 30, 5, "Diagonal Boder styles", $heading );

    for my $i ( 1 .. 3 ) {
        my $format = $workbook->add_format();
        $format->set_diag_type( $i );
        $format->set_diag_border( 1 );
        $format->set_diag_color( 'red' );
        $format->set_align( 'center' );

        $worksheet->write( ( 2 * ( $i + 15 ) ), 0, $i, $center );
        $worksheet->write( ( 2 * ( $i + 15 ) ),
            1, sprintf( "0x%02X", $i ), $center );

        $worksheet->write( ( 2 * ( $i + 15 ) ), 3, "Border", $format );
    }
}


######################################################################
#
# Demonstrate the standard Excel cell patterns.
#
sub patterns {

    my $worksheet = $workbook->add_worksheet( 'Patterns' );

    $worksheet->set_column( 0, 4, 10 );
    $worksheet->set_column( 5, 5, 50 );

    $worksheet->write( 0, 0, "Index",   $heading );
    $worksheet->write( 0, 1, "Index",   $heading );
    $worksheet->write( 0, 3, "Pattern", $heading );

    $worksheet->write( 0, 5, "The background colour has been set to silver.",
        $heading );
    $worksheet->write( 1, 5, "The foreground colour has been set to green.",
        $heading );

    for my $i ( 0 .. 18 ) {
        my $format = $workbook->add_format();

        $format->set_pattern( $i );
        $format->set_bg_color( 'silver' );
        $format->set_fg_color( 'green' );
        $format->set_align( 'center' );

        $worksheet->write( ( 2 * ( $i + 1 ) ), 0, $i, $center );
        $worksheet->write( ( 2 * ( $i + 1 ) ),
            1, sprintf( "0x%02X", $i ), $center );

        $worksheet->write( ( 2 * ( $i + 1 ) ), 3, "Pattern", $format );

        if ( $i == 1 ) {
            $worksheet->write( ( 2 * ( $i + 1 ) ),
                5, "This is solid colour, the most useful pattern.", $heading );
        }
    }
}


######################################################################
#
# Demonstrate the standard Excel cell alignments.
#
sub alignment {

    my $worksheet = $workbook->add_worksheet( 'Alignment' );

    $worksheet->set_column( 0, 7, 12 );
    $worksheet->set_row( 0, 40 );
    $worksheet->set_selection( 7, 0 );

    my $format01 = $workbook->add_format();
    my $format02 = $workbook->add_format();
    my $format03 = $workbook->add_format();
    my $format04 = $workbook->add_format();
    my $format05 = $workbook->add_format();
    my $format06 = $workbook->add_format();
    my $format07 = $workbook->add_format();
    my $format08 = $workbook->add_format();
    my $format09 = $workbook->add_format();
    my $format10 = $workbook->add_format();
    my $format11 = $workbook->add_format();
    my $format12 = $workbook->add_format();
    my $format13 = $workbook->add_format();
    my $format14 = $workbook->add_format();
    my $format15 = $workbook->add_format();
    my $format16 = $workbook->add_format();
    my $format17 = $workbook->add_format();

    $format02->set_align( 'top' );
    $format03->set_align( 'bottom' );
    $format04->set_align( 'vcenter' );
    $format05->set_align( 'vjustify' );
    $format06->set_text_wrap();

    $format07->set_align( 'left' );
    $format08->set_align( 'right' );
    $format09->set_align( 'center' );
    $format10->set_align( 'fill' );
    $format11->set_align( 'justify' );
    $format12->set_merge();

    $format13->set_rotation( 45 );
    $format14->set_rotation( -45 );
    $format15->set_rotation( 270 );

    $format16->set_shrink();
    $format17->set_indent( 1 );

    $worksheet->write( 0, 0, 'Vertical',   $heading );
    $worksheet->write( 0, 1, 'top',        $format02 );
    $worksheet->write( 0, 2, 'bottom',     $format03 );
    $worksheet->write( 0, 3, 'vcenter',    $format04 );
    $worksheet->write( 0, 4, 'vjustify',   $format05 );
    $worksheet->write( 0, 5, "text\nwrap", $format06 );

    $worksheet->write( 2, 0, 'Horizontal', $heading );
    $worksheet->write( 2, 1, 'left',       $format07 );
    $worksheet->write( 2, 2, 'right',      $format08 );
    $worksheet->write( 2, 3, 'center',     $format09 );
    $worksheet->write( 2, 4, 'fill',       $format10 );
    $worksheet->write( 2, 5, 'justify',    $format11 );

    $worksheet->write( 3, 1, 'merge', $format12 );
    $worksheet->write( 3, 2, '',      $format12 );

    $worksheet->write( 3, 3, 'Shrink ' x 3, $format16 );
    $worksheet->write( 3, 4, 'Indent',      $format17 );


    $worksheet->write( 5, 0, 'Rotation',   $heading );
    $worksheet->write( 5, 1, 'Rotate 45',  $format13 );
    $worksheet->write( 6, 1, 'Rotate -45', $format14 );
    $worksheet->write( 7, 1, 'Rotate 270', $format15 );
}


######################################################################
#
# Demonstrate other miscellaneous features.
#
sub misc {

    my $worksheet = $workbook->add_worksheet( 'Miscellaneous' );

    $worksheet->set_column( 2, 2, 25 );

    my $format01 = $workbook->add_format();
    my $format02 = $workbook->add_format();
    my $format03 = $workbook->add_format();
    my $format04 = $workbook->add_format();
    my $format05 = $workbook->add_format();
    my $format06 = $workbook->add_format();
    my $format07 = $workbook->add_format();

    $format01->set_underline( 0x01 );
    $format02->set_underline( 0x02 );
    $format03->set_underline( 0x21 );
    $format04->set_underline( 0x22 );
    $format05->set_font_strikeout();
    $format06->set_font_outline();
    $format07->set_font_shadow();

    $worksheet->write( 1,  2, 'Underline  0x01',          $format01 );
    $worksheet->write( 3,  2, 'Underline  0x02',          $format02 );
    $worksheet->write( 5,  2, 'Underline  0x21',          $format03 );
    $worksheet->write( 7,  2, 'Underline  0x22',          $format04 );
    $worksheet->write( 9,  2, 'Strikeout',                $format05 );
    $worksheet->write( 11, 2, 'Outline (Macintosh only)', $format06 );
    $worksheet->write( 13, 2, 'Shadow (Macintosh only)',  $format07 );
}

__END__
Download this example: http://cpansearch.perl.org/src/JMCNAMARA/Excel-Writer-XLSX-0.05/examples/formats.pl
Example: regions.pl
An example of how to use the Excel::Writer::XLSX module to write a basic Excel workbook with multiple worksheets.
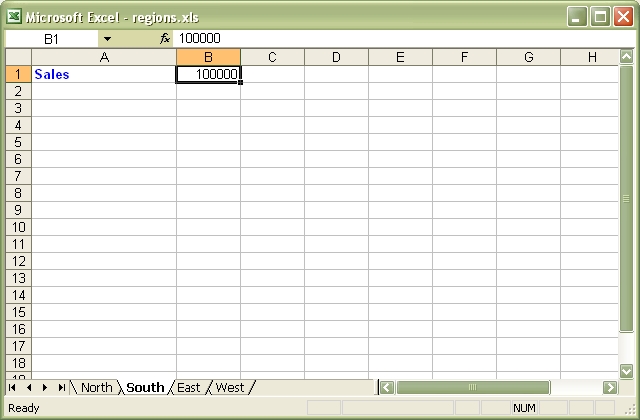
Source code for this example:
#!/usr/bin/perl -w

###############################################################################
#
# An example of how to use the Excel::Writer::XLSX module to write a basic
# Excel workbook with multiple worksheets.
#
# reverse('©'), March 2001, John McNamara, jmcnamara@cpan.org
#

use strict;
use Excel::Writer::XLSX;

# Create a new Excel workbook
my $workbook = Excel::Writer::XLSX->new( 'regions.xlsx' );

# Add some worksheets
my $north = $workbook->add_worksheet( "North" );
my $south = $workbook->add_worksheet( "South" );
my $east  = $workbook->add_worksheet( "East" );
my $west  = $workbook->add_worksheet( "West" );

# Add a Format
my $format = $workbook->add_format();
$format->set_bold();
$format->set_color( 'blue' );

# Add a caption to each worksheet
foreach my $worksheet ( $workbook->sheets() ) {
    $worksheet->write( 0, 0, "Sales", $format );
}

# Write some data
$north->write( 0, 1, 200000 );
$south->write( 0, 1, 100000 );
$east->write( 0, 1, 150000 );
$west->write( 0, 1, 100000 );

# Set the active worksheet
$south->activate();

# Set the width of the first column
$south->set_column( 0, 0, 20 );

# Set the active cell
$south->set_selection( 0, 1 );
Download this example: http://cpansearch.perl.org/src/JMCNAMARA/Excel-Writer-XLSX-0.05/examples/regions.pl
Example: stats.pl
A simple example of how to use functions with the Excel::Writer::XLSX module.
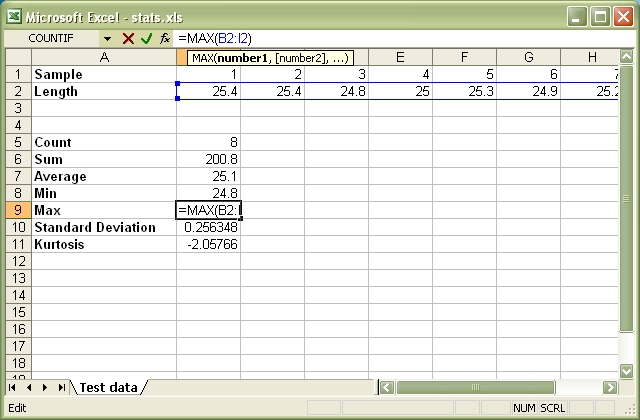
Source code for this example:
#!/usr/bin/perl -w

###############################################################################
#
# A simple example of how to use functions with the Excel::Writer::XLSX
# module.
#
# reverse('©'), March 2001, John McNamara, jmcnamara@cpan.org
#

use strict;
use Excel::Writer::XLSX;

# Create a new workbook and add a worksheet
my $workbook  = Excel::Writer::XLSX->new( 'stats.xlsx' );
my $worksheet = $workbook->add_worksheet( 'Test data' );

# Set the column width for columns 1
$worksheet->set_column( 0, 0, 20 );


# Create a format for the headings
my $format = $workbook->add_format();
$format->set_bold();


# Write the sample data
$worksheet->write( 0, 0, 'Sample', $format );
$worksheet->write( 0, 1, 1 );
$worksheet->write( 0, 2, 2 );
$worksheet->write( 0, 3, 3 );
$worksheet->write( 0, 4, 4 );
$worksheet->write( 0, 5, 5 );
$worksheet->write( 0, 6, 6 );
$worksheet->write( 0, 7, 7 );
$worksheet->write( 0, 8, 8 );

$worksheet->write( 1, 0, 'Length', $format );
$worksheet->write( 1, 1, 25.4 );
$worksheet->write( 1, 2, 25.4 );
$worksheet->write( 1, 3, 24.8 );
$worksheet->write( 1, 4, 25.0 );
$worksheet->write( 1, 5, 25.3 );
$worksheet->write( 1, 6, 24.9 );
$worksheet->write( 1, 7, 25.2 );
$worksheet->write( 1, 8, 24.8 );

# Write some statistical functions
$worksheet->write( 4, 0, 'Count', $format );
$worksheet->write( 4, 1, '=COUNT(B1:I1)' );

$worksheet->write( 5, 0, 'Sum', $format );
$worksheet->write( 5, 1, '=SUM(B2:I2)' );

$worksheet->write( 6, 0, 'Average', $format );
$worksheet->write( 6, 1, '=AVERAGE(B2:I2)' );

$worksheet->write( 7, 0, 'Min', $format );
$worksheet->write( 7, 1, '=MIN(B2:I2)' );

$worksheet->write( 8, 0, 'Max', $format );
$worksheet->write( 8, 1, '=MAX(B2:I2)' );

$worksheet->write( 9, 0, 'Standard Deviation', $format );
$worksheet->write( 9, 1, '=STDEV(B2:I2)' );

$worksheet->write( 10, 0, 'Kurtosis', $format );
$worksheet->write( 10, 1, '=KURT(B2:I2)' );

__END__
Download this example: http://cpansearch.perl.org/src/JMCNAMARA/Excel-Writer-XLSX-0.05/examples/stats.pl
Example: array_formula.pl
Example of how to use the Excel::Writer::XLSX module to write simple array formulas.
#!/usr/bin/perl

#######################################################################
#
# Example of how to use the Excel::Writer::XLSX module to write simple
# array formulas.
#
# reverse('©'), August 2004, John McNamara, jmcnamara@cpan.org
#

use strict;
use warnings;
use Excel::Writer::XLSX;

# Create a new workbook and add a worksheet
my $workbook  = Excel::Writer::XLSX->new( 'array_formula.xlsx' );
my $worksheet = $workbook->add_worksheet();

# Write some test data.
$worksheet->write( 'B1', [ [ 500, 10 ], [ 300, 15 ] ] );
$worksheet->write( 'B5', [ [ 1, 2, 3 ], [ 20234, 21003, 10000 ] ] );

# Write an array formula that returns a single value
$worksheet->write( 'A1', '{=SUM(B1:C1*B2:C2)}' );

# Same as above but more verbose.
$worksheet->write_array_formula( 'A2:A2', '{=SUM(B1:C1*B2:C2)}' );

# Write an array formula that returns a range of values
$worksheet->write_array_formula( 'A5:A7', '{=TREND(C5:C7,B5:B7)}' );

__END__
Download this example: http://cpansearch.perl.org/src/JMCNAMARA/Excel-Writer-XLSX-0.05/examples/array_formula.pl
Example: cgi.pl
Example of how to use the Excel::Writer::XLSX module to send an Excel file to a browser in a CGI program.
On Windows the hash-bang line should be something like:
#!C:\Perl\bin\perl.exeThe "Content-Disposition" line will cause a prompt to be generated to save the file. If you want to stream the file to the browser instead, comment out that line as shown below.
#!/usr/bin/perl -w

###############################################################################
#
# Example of how to use the Excel::Writer::XLSX module to send an Excel
# file to a browser in a CGI program.
#
# On Windows the hash-bang line should be something like:
#
#     #!C:\Perl\bin\perl.exe
#
# The "Content-Disposition" line will cause a prompt to be generated to save
# the file. If you want to stream the file to the browser instead, comment out
# that line as shown below.
#
# reverse('©'), March 2001, John McNamara, jmcnamara@cpan.org
#

use strict;
use Excel::Writer::XLSX;

# Set the filename and send the content type
my $filename = "cgitest.xlsx";

print "Content-type: application/vnd.ms-excel\n";

# The Content-Disposition will generate a prompt to save the file. If you want
# to stream the file to the browser, comment out the following line.
print "Content-Disposition: attachment; filename=$filename\n";
print "\n";

# Create a new workbook and add a worksheet. The special Perl filehandle - will
# redirect the output to STDOUT
#
my $workbook  = Excel::Writer::XLSX->new( "-" );
my $worksheet = $workbook->add_worksheet();


# Set the column width for column 1
$worksheet->set_column( 0, 0, 20 );


# Create a format
my $format = $workbook->add_format();
$format->set_bold();
$format->set_size( 15 );
$format->set_color( 'blue' );


# Write to the workbook
$worksheet->write( 0, 0, "Hi Excel!", $format );

__END__
Download this example: http://cpansearch.perl.org/src/JMCNAMARA/Excel-Writer-XLSX-0.05/examples/cgi.pl
Example: colors.pl
Demonstrates Excel::Writer::XLSX's named colors and the Excel color palette.
The set_custom_color() Worksheet method can be used to override one of the built-in palette values with a more suitable colour. See the main docs.

Source code for this example:
#!/usr/bin/perl -w

################################################################################
#
# Demonstrates Excel::Writer::XLSX's named colors and the Excel color
# palette.
#
# The set_custom_color() Worksheet method can be used to override one of the
# built-in palette values with a more suitable colour. See the main docs.
#
# reverse('©'), March 2002, John McNamara, jmcnamara@cpan.org
#

use strict;
use Excel::Writer::XLSX;

my $workbook = Excel::Writer::XLSX->new( 'colors.xlsx' );

# Some common formats
my $center = $workbook->add_format( align => 'center' );
my $heading = $workbook->add_format( align => 'center', bold => 1 );


######################################################################
#
# Demonstrate the named colors.
#

my %colors = (
    0x08, 'black',
    0x0C, 'blue',
    0x10, 'brown',
    0x0F, 'cyan',
    0x17, 'gray',
    0x11, 'green',
    0x0B, 'lime',
    0x0E, 'magenta',
    0x12, 'navy',
    0x35, 'orange',
    0x21, 'pink',
    0x14, 'purple',
    0x0A, 'red',
    0x16, 'silver',
    0x09, 'white',
    0x0D, 'yellow',

);

my $worksheet1 = $workbook->add_worksheet( 'Named colors' );

$worksheet1->set_column( 0, 3, 15 );

$worksheet1->write( 0, 0, "Index", $heading );
$worksheet1->write( 0, 1, "Index", $heading );
$worksheet1->write( 0, 2, "Name",  $heading );
$worksheet1->write( 0, 3, "Color", $heading );

my $i = 1;

while ( my ( $index, $color ) = each %colors ) {
    my $format = $workbook->add_format(
        fg_color => $color,
        pattern  => 1,
        border   => 1
    );

    $worksheet1->write( $i + 1, 0, $index, $center );
    $worksheet1->write( $i + 1, 1, sprintf( "0x%02X", $index ), $center );
    $worksheet1->write( $i + 1, 2, $color, $center );
    $worksheet1->write( $i + 1, 3, '',     $format );
    $i++;
}


######################################################################
#
# Demonstrate the standard Excel colors in the range 8..63.
#

my $worksheet2 = $workbook->add_worksheet( 'Standard colors' );

$worksheet2->set_column( 0, 3, 15 );

$worksheet2->write( 0, 0, "Index", $heading );
$worksheet2->write( 0, 1, "Index", $heading );
$worksheet2->write( 0, 2, "Color", $heading );
$worksheet2->write( 0, 3, "Name",  $heading );

for my $i ( 8 .. 63 ) {
    my $format = $workbook->add_format(
        fg_color => $i,
        pattern  => 1,
        border   => 1
    );

    $worksheet2->write( ( $i - 7 ), 0, $i, $center );
    $worksheet2->write( ( $i - 7 ), 1, sprintf( "0x%02X", $i ), $center );
    $worksheet2->write( ( $i - 7 ), 2, '', $format );

    # Add the  color names
    if ( exists $colors{$i} ) {
        $worksheet2->write( ( $i - 7 ), 3, $colors{$i}, $center );

    }
}

__END__
Download this example: http://cpansearch.perl.org/src/JMCNAMARA/Excel-Writer-XLSX-0.05/examples/colors.pl
Example: diag_border.pl
A simple formatting example that demonstrates how to add a diagonal cell border with Excel::Writer::XLSX
Source code for this example:
#!/usr/bin/perl -w

##############################################################################
#
# A simple formatting example that demonstrates how to add a diagonal cell
# border with Excel::Writer::XLSX
#
# reverse('©'), May 2004, John McNamara, jmcnamara@cpan.org
#

use strict;
use Excel::Writer::XLSX;


my $workbook  = Excel::Writer::XLSX->new( 'diag_border.xlsx' );
my $worksheet = $workbook->add_worksheet();


my $format1 = $workbook->add_format( diag_type => '1' );

my $format2 = $workbook->add_format( diag_type => '2' );

my $format3 = $workbook->add_format( diag_type => '3' );

my $format4 = $workbook->add_format(
    diag_type   => '3',
    diag_border => '7',
    diag_color  => 'red',
);


$worksheet->write( 'B3',  'Text', $format1 );
$worksheet->write( 'B6',  'Text', $format2 );
$worksheet->write( 'B9',  'Text', $format3 );
$worksheet->write( 'B12', 'Text', $format4 );


__END__
Download this example: http://cpansearch.perl.org/src/JMCNAMARA/Excel-Writer-XLSX-0.05/examples/diag_border.pl
Example: indent.pl
A simple formatting example using Excel::Writer::XLSX.
This program demonstrates the indentation cell format.
Source code for this example:
#!/usr/bin/perl -w

##############################################################################
#
# A simple formatting example using Excel::Writer::XLSX.
#
# This program demonstrates the indentation cell format.
#
# reverse('©'), May 2004, John McNamara, jmcnamara@cpan.org
#


use strict;
use Excel::Writer::XLSX;

my $workbook = Excel::Writer::XLSX->new( 'indent.xlsx' );

my $worksheet = $workbook->add_worksheet();
my $indent1   = $workbook->add_format( indent => 1 );
my $indent2   = $workbook->add_format( indent => 2 );

$worksheet->set_column( 'A:A', 40 );


$worksheet->write( 'A1', "This text is indented 1 level",  $indent1 );
$worksheet->write( 'A2', "This text is indented 2 levels", $indent2 );


__END__
Download this example: http://cpansearch.perl.org/src/JMCNAMARA/Excel-Writer-XLSX-0.05/examples/indent.pl
Example: merge1.pl
Simple example of merging cells using the Excel::Writer::XLSX module.
This example merges three cells using the "Centre Across Selection" alignment which was the Excel 5 method of achieving a merge. For a more modern approach use the merge_range() worksheet method instead. See the merge3.pl - merge6.pl programs.
Source code for this example:
#!/usr/bin/perl

###############################################################################
#
# Simple example of merging cells using the Excel::Writer::XLSX module.
#
# This example merges three cells using the "Centre Across Selection"
# alignment which was the Excel 5 method of achieving a merge. For a more
# modern approach use the merge_range() worksheet method instead.
# See the merge3.pl - merge6.pl programs.
#
# reverse('©'), August 2002, John McNamara, jmcnamara@cpan.org
#

use strict;
use warnings;
use Excel::Writer::XLSX;

# Create a new workbook and add a worksheet
my $workbook  = Excel::Writer::XLSX->new( 'merge1.xlsx' );
my $worksheet = $workbook->add_worksheet();


# Increase the cell size of the merged cells to highlight the formatting.
$worksheet->set_column( 'B:D', 20 );
$worksheet->set_row( 2, 30 );


# Create a merge format
my $format = $workbook->add_format( center_across => 1 );


# Only one cell should contain text, the others should be blank.
$worksheet->write( 2, 1, "Center across selection", $format );
$worksheet->write_blank( 2, 2, $format );
$worksheet->write_blank( 2, 3, $format );
Download this example: http://cpansearch.perl.org/src/JMCNAMARA/Excel-Writer-XLSX-0.05/examples/merge1.pl
Example: merge2.pl
Simple example of merging cells using the Excel::Writer::XLSX module
This example merges three cells using the "Centre Across Selection" alignment which was the Excel 5 method of achieving a merge. For a more modern approach use the merge_range() worksheet method instead. See the merge3.pl - merge6.pl programs.
Source code for this example:
#!/usr/bin/perl

###############################################################################
#
# Simple example of merging cells using the Excel::Writer::XLSX module
#
# This example merges three cells using the "Centre Across Selection"
# alignment which was the Excel 5 method of achieving a merge. For a more
# modern approach use the merge_range() worksheet method instead.
# See the merge3.pl - merge6.pl programs.
#
# reverse('©'), August 2002, John McNamara, jmcnamara@cpan.org
#

use strict;
use warnings;
use Excel::Writer::XLSX;

# Create a new workbook and add a worksheet
my $workbook  = Excel::Writer::XLSX->new( 'merge2.xlsx' );
my $worksheet = $workbook->add_worksheet();


# Increase the cell size of the merged cells to highlight the formatting.
$worksheet->set_column( 1, 2, 30 );
$worksheet->set_row( 2, 40 );


# Create a merged format
my $format = $workbook->add_format(
    center_across => 1,
    bold          => 1,
    size          => 15,
    pattern       => 1,
    border        => 6,
    color         => 'white',
    fg_color      => 'green',
    border_color  => 'yellow',
    align         => 'vcenter',
);


# Only one cell should contain text, the others should be blank.
$worksheet->write( 2, 1, "Center across selection", $format );
$worksheet->write_blank( 2, 2, $format );
Download this example: http://cpansearch.perl.org/src/JMCNAMARA/Excel-Writer-XLSX-0.05/examples/merge2.pl
Example: merge3.pl
Example of how to use Excel::Writer::XLSX to write a hyperlink in a merged cell. There are two options write_url_range() with a standard merge format or merge_range().
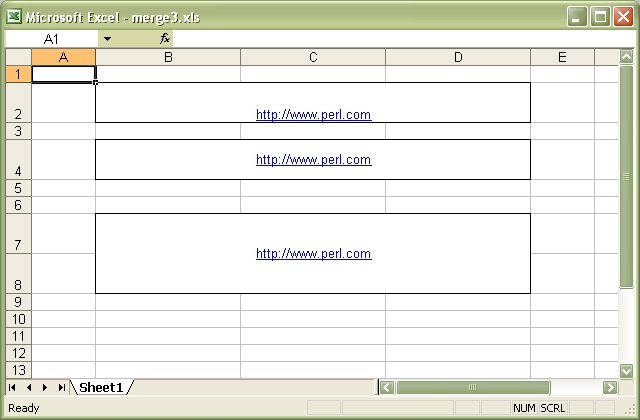
Source code for this example:
#!/usr/bin/perl

###############################################################################
#
# Example of how to use Excel::Writer::XLSX to write a hyperlink in a
# merged cell. There are two options write_url_range() with a standard merge
# format or merge_range().
#
# reverse('©'), September 2002, John McNamara, jmcnamara@cpan.org
#

use strict;
use warnings;
use Excel::Writer::XLSX;

# Create a new workbook and add a worksheet
my $workbook  = Excel::Writer::XLSX->new( 'merge3.xlsx' );
my $worksheet = $workbook->add_worksheet();


# Increase the cell size of the merged cells to highlight the formatting.
$worksheet->set_row( $_, 30 ) for ( 1, 3, 6, 7 );
$worksheet->set_column( 'B:D', 20 );


###############################################################################
#
# Example 1: Merge cells containing a hyperlink using write_url_range()
# and the standard Excel 5+ merge property.
#
my $format1 = $workbook->add_format(
    center_across => 1,
    border        => 1,
    underline     => 1,
    color         => 'blue',
);

# Write the cells to be merged
$worksheet->write_url_range( 'B2:D2', 'http://www.perl.com', $format1 );
$worksheet->write_blank( 'C2', $format1 );
$worksheet->write_blank( 'D2', $format1 );


###############################################################################
#
# Example 2: Merge cells containing a hyperlink using merge_range().
#
my $format2 = $workbook->add_format(
    border    => 1,
    underline => 1,
    color     => 'blue',
    align     => 'center',
    valign    => 'vcenter',
);

# Merge 3 cells
$worksheet->merge_range( 'B4:D4', 'http://www.perl.com', $format2 );


# Merge 3 cells over two rows
$worksheet->merge_range( 'B7:D8', 'http://www.perl.com', $format2 );
Download this example: http://cpansearch.perl.org/src/JMCNAMARA/Excel-Writer-XLSX-0.05/examples/merge3.pl
Example: merge4.pl
Example of how to use the Excel::Writer::XLSX merge_range() workbook method with complex formatting.
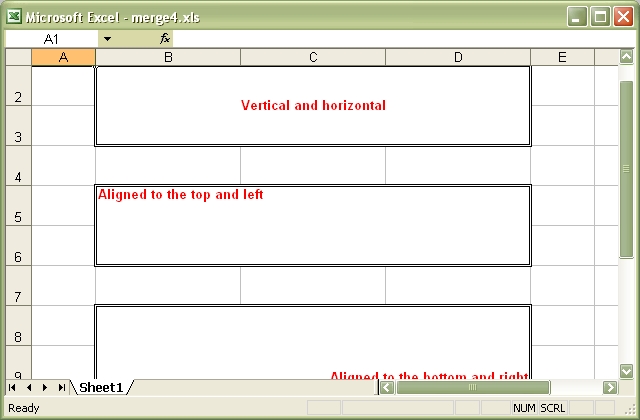
Source code for this example:
#!/usr/bin/perl

###############################################################################
#
# Example of how to use the Excel::Writer::XLSX merge_range() workbook
# method with complex formatting.
#
# reverse('©'), September 2002, John McNamara, jmcnamara@cpan.org
#

use strict;
use warnings;
use Excel::Writer::XLSX;

# Create a new workbook and add a worksheet
my $workbook  = Excel::Writer::XLSX->new( 'merge4.xlsx' );
my $worksheet = $workbook->add_worksheet();


# Increase the cell size of the merged cells to highlight the formatting.
$worksheet->set_row( $_, 30 ) for ( 1 .. 11 );
$worksheet->set_column( 'B:D', 20 );


###############################################################################
#
# Example 1: Text centered vertically and horizontally
#
my $format1 = $workbook->add_format(
    border => 6,
    bold   => 1,
    color  => 'red',
    valign => 'vcenter',
    align  => 'center',
);


$worksheet->merge_range( 'B2:D3', 'Vertical and horizontal', $format1 );


###############################################################################
#
# Example 2: Text aligned to the top and left
#
my $format2 = $workbook->add_format(
    border => 6,
    bold   => 1,
    color  => 'red',
    valign => 'top',
    align  => 'left',
);


$worksheet->merge_range( 'B5:D6', 'Aligned to the top and left', $format2 );


###############################################################################
#
# Example 3:  Text aligned to the bottom and right
#
my $format3 = $workbook->add_format(
    border => 6,
    bold   => 1,
    color  => 'red',
    valign => 'bottom',
    align  => 'right',
);


$worksheet->merge_range( 'B8:D9', 'Aligned to the bottom and right', $format3 );


###############################################################################
#
# Example 4:  Text justified (i.e. wrapped) in the cell
#
my $format4 = $workbook->add_format(
    border => 6,
    bold   => 1,
    color  => 'red',
    valign => 'top',
    align  => 'justify',
);


$worksheet->merge_range( 'B11:D12', 'Justified: ' . 'so on and ' x 18,
    $format4 );
Download this example: http://cpansearch.perl.org/src/JMCNAMARA/Excel-Writer-XLSX-0.05/examples/merge4.pl
Example: merge5.pl
Example of how to use the Excel::Writer::XLSX merge_cells() workbook method with complex formatting and rotation.
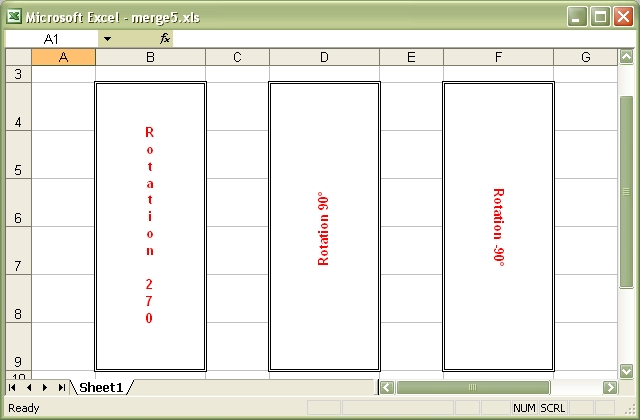
Source code for this example:
#!/usr/bin/perl

###############################################################################
#
# Example of how to use the Excel::Writer::XLSX merge_cells() workbook
# method with complex formatting and rotation.
#
#
# reverse('©'), September 2002, John McNamara, jmcnamara@cpan.org
#

use strict;
use warnings;
use Excel::Writer::XLSX;

# Create a new workbook and add a worksheet
my $workbook  = Excel::Writer::XLSX->new( 'merge5.xlsx' );
my $worksheet = $workbook->add_worksheet();


# Increase the cell size of the merged cells to highlight the formatting.
$worksheet->set_row( $_, 36 ) for ( 3 .. 8 );
$worksheet->set_column( $_, $_, 15 ) for ( 1, 3, 5 );


###############################################################################
#
# Rotation 1, letters run from top to bottom
#
my $format1 = $workbook->add_format(
    border   => 6,
    bold     => 1,
    color    => 'red',
    valign   => 'vcentre',
    align    => 'centre',
    rotation => 270,
);


$worksheet->merge_range( 'B4:B9', 'Rotation 270', $format1 );


###############################################################################
#
# Rotation 2, 90° anticlockwise
#
my $format2 = $workbook->add_format(
    border   => 6,
    bold     => 1,
    color    => 'red',
    valign   => 'vcentre',
    align    => 'centre',
    rotation => 90,
);


$worksheet->merge_range( 'D4:D9', 'Rotation 90°', $format2 );


###############################################################################
#
# Rotation 3, 90° clockwise
#
my $format3 = $workbook->add_format(
    border   => 6,
    bold     => 1,
    color    => 'red',
    valign   => 'vcentre',
    align    => 'centre',
    rotation => -90,
);


$worksheet->merge_range( 'F4:F9', 'Rotation -90°', $format3 );
Download this example: http://cpansearch.perl.org/src/JMCNAMARA/Excel-Writer-XLSX-0.05/examples/merge5.pl
Example: merge6.pl
Example of how to use the Excel::Writer::XLSX merge_cells() workbook method with Unicode strings.
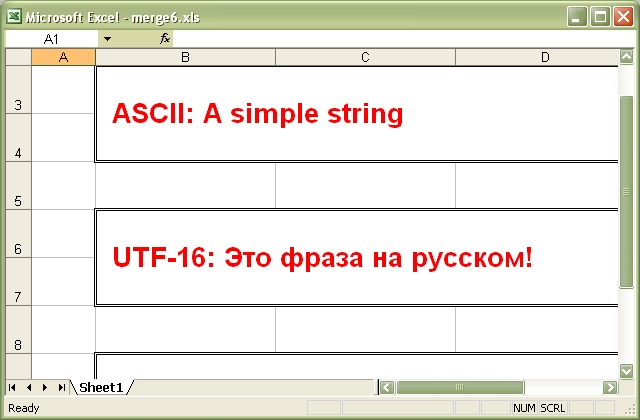
Source code for this example:
#!/usr/bin/perl

###############################################################################
#
# Example of how to use the Excel::Writer::XLSX merge_cells() workbook
# method with Unicode strings.
#
#
# reverse('©'), December 2005, John McNamara, jmcnamara@cpan.org
#

use strict;
use warnings;
use Excel::Writer::XLSX;

# Create a new workbook and add a worksheet
my $workbook  = Excel::Writer::XLSX->new( 'merge6.xlsx' );
my $worksheet = $workbook->add_worksheet();


# Increase the cell size of the merged cells to highlight the formatting.
$worksheet->set_row( $_, 36 ) for 2 .. 9;
$worksheet->set_column( 'B:D', 25 );


# Format for the merged cells.
my $format = $workbook->add_format(
    border => 6,
    bold   => 1,
    color  => 'red',
    size   => 20,
    valign => 'vcentre',
    align  => 'left',
    indent => 1,
);


###############################################################################
#
# Write an Ascii string.
#
$worksheet->merge_range( 'B3:D4', 'ASCII: A simple string', $format );


###############################################################################
#
# Write a UTF-8 Unicode string.
#
my $smiley = chr 0x263a;
$worksheet->merge_range( 'B6:D7', "UTF-8: A Unicode smiley $smiley", $format );

__END__
Download this example: http://cpansearch.perl.org/src/JMCNAMARA/Excel-Writer-XLSX-0.05/examples/merge6.pl
Example: mod_perl1.pl
Example of how to use the Excel::Writer::XLSX module to send an Excel file to a browser using mod_perl 1 and Apache
This module ties *XLSX directly to Apache, and with the correct content-disposition/types it will prompt the user to save the file, or open it at this location.
This script is a modification of the Excel::Writer::XLSX cgi.pl example.
Change the name of this file to Cgi.pm. Change the package location to where ever you locate this package. In the example below it is located in the WriteExcel directory.
Your httpd.conf entry for this module, should you choose to use it as a stand alone app, should look similar to the following:
<Location /spreadsheet-test>
  SetHandler perl-script
  PerlHandler Excel::Writer::XLSX::Cgi
  PerlSendHeader On
</Location>
The PerlHandler name above and the package name below *have* to match.
###############################################################################
#
# Example of how to use the Excel::Writer::XLSX module to send an Excel
# file to a browser using mod_perl 1 and Apache
#
# This module ties *XLSX directly to Apache, and with the correct
# content-disposition/types it will prompt the user to save
# the file, or open it at this location.
#
# This script is a modification of the Excel::Writer::XLSX cgi.pl example.
#
# Change the name of this file to Cgi.pm.
# Change the package location to where ever you locate this package.
# In the example below it is located in the WriteExcel directory.
#
# Your httpd.conf entry for this module, should you choose to use it
# as a stand alone app, should look similar to the following:
#
#     <Location /spreadsheet-test>
#       SetHandler perl-script
#       PerlHandler Excel::Writer::XLSX::Cgi
#       PerlSendHeader On
#     </Location>
#
# The PerlHandler name above and the package name below *have* to match.

# Apr 2001, Thomas Sullivan, webmaster@860.org
# Feb 2001, John McNamara, jmcnamara@cpan.org

package Excel::Writer::XLSX::Cgi;

##########################################
# Pragma Definitions
##########################################
use strict;

##########################################
# Required Modules
##########################################
use Apache::Constants qw(:common);
use Apache::Request;
use Apache::URI;    # This may not be needed
use Excel::Writer::XLSX;

##########################################
# Main App Body
##########################################
sub handler {

    # New apache object
    # Should you decide to use it.
    my $r = Apache::Request->new( shift );

    # Set the filename and send the content type
    # This will appear when they save the spreadsheet
    my $filename = "cgitest.xlsx";

    ####################################################
    ## Send the content type headers
    ####################################################
    print "Content-disposition: attachment;filename=$filename\n";
    print "Content-type: application/vnd.ms-excel\n\n";

    ####################################################
    # Tie a filehandle to Apache's STDOUT.
    # Create a new workbook and add a worksheet.
    ####################################################
    tie *XLSX => 'Apache';
    binmode( *XLSX );

    my $workbook  = Excel::Writer::XLSX->new( \*XLSX );
    my $worksheet = $workbook->add_worksheet();


    # Set the column width for column 1
    $worksheet->set_column( 0, 0, 20 );


    # Create a format
    my $format = $workbook->add_format();
    $format->set_bold();
    $format->set_size( 15 );
    $format->set_color( 'blue' );


    # Write to the workbook
    $worksheet->write( 0, 0, "Hi Excel!", $format );

    # You must close the workbook for Content-disposition
    $workbook->close();
}

1;
Download this example: http://cpansearch.perl.org/src/JMCNAMARA/Excel-Writer-XLSX-0.05/examples/mod_perl1.pl
Example: mod_perl2.pl
Example of how to use the Excel::Writer::XLSX module to send an Excel file to a browser using mod_perl 2 and Apache.
This module ties *XLSX directly to Apache, and with the correct content-disposition/types it will prompt the user to save the file, or open it at this location.
This script is a modification of the Excel::Writer::XLSX cgi.pl example.
Change the name of this file to MP2Test.pm. Change the package location to where ever you locate this package. In the example below it is located in the WriteExcel directory.
Your httpd.conf entry for this module, should you choose to use it as a stand alone app, should look similar to the following:
PerlModule Apache2::RequestRec
PerlModule APR::Table
PerlModule Apache2::RequestIO

<Location /spreadsheet-test>
   SetHandler perl-script
   PerlResponseHandler Excel::Writer::XLSX::MP2Test
</Location>
The PerlResponseHandler must match the package name below.
###############################################################################
#
# Example of how to use the Excel::Writer::XLSX module to send an Excel
# file to a browser using mod_perl 2 and Apache.
#
# This module ties *XLSX directly to Apache, and with the correct
# content-disposition/types it will prompt the user to save
# the file, or open it at this location.
#
# This script is a modification of the Excel::Writer::XLSX cgi.pl example.
#
# Change the name of this file to MP2Test.pm.
# Change the package location to where ever you locate this package.
# In the example below it is located in the WriteExcel directory.
#
# Your httpd.conf entry for this module, should you choose to use it
# as a stand alone app, should look similar to the following:
#
#     PerlModule Apache2::RequestRec
#     PerlModule APR::Table
#     PerlModule Apache2::RequestIO
#
#     <Location /spreadsheet-test>
#        SetHandler perl-script
#        PerlResponseHandler Excel::Writer::XLSX::MP2Test
#     </Location>
#
# The PerlResponseHandler must match the package name below.

# Jun 2004, Matisse Enzer, matisse@matisse.net  (mod_perl 2 version)
# Apr 2001, Thomas Sullivan, webmaster@860.org
# Feb 2001, John McNamara, jmcnamara@cpan.org

package Excel::Writer::XLSX::MP2Test;

##########################################
# Pragma Definitions
##########################################
use strict;

##########################################
# Required Modules
##########################################
use Apache2::Const -compile => qw( :common );
use Excel::Writer::XLSX;

##########################################
# Main App Body
##########################################
sub handler {
    my ( $r ) = @_;   # Apache request object is passed to handler in mod_perl 2

    # Set the filename and send the content type
    # This will appear when they save the spreadsheet
    my $filename = "mod_perl2_test.xlsx";

    ####################################################
    ## Send the content type headers the mod_perl 2 way
    ####################################################
    $r->headers_out->{'Content-Disposition'} = "attachment;filename=$filename";
    $r->content_type( 'application/vnd.ms-excel' );

    ####################################################
    # Tie a filehandle to Apache's STDOUT.
    # Create a new workbook and add a worksheet.
    ####################################################
    tie *XLSX => $r;  # The mod_perl 2 way. Tie to the Apache::RequestRec object
    binmode( *XLSX );

    my $workbook  = Excel::Writer::XLSX->new( \*XLSX );
    my $worksheet = $workbook->add_worksheet();


    # Set the column width for column 1
    $worksheet->set_column( 0, 0, 20 );


    # Create a format
    my $format = $workbook->add_format();
    $format->set_bold();
    $format->set_size( 15 );
    $format->set_color( 'blue' );


    # Write to the workbook
    $worksheet->write( 0, 0, 'Hi Excel! from ' . $r->hostname, $format );

    # You must close the workbook for Content-disposition
    $workbook->close();
    return Apache2::Const::OK;
}

1;
Download this example: http://cpansearch.perl.org/src/JMCNAMARA/Excel-Writer-XLSX-0.05/examples/mod_perl2.pl
Example: sales.pl
Example of a sales worksheet to demonstrate several different features. Also uses functions from the Excel::Writer::XLSX::Utility module.
Source code for this example:
#!/usr/bin/perl -w

###############################################################################
#
# Example of a sales worksheet to demonstrate several different features.
# Also uses functions from the L<Excel::Writer::XLSX::Utility> module.
#
# reverse('©'), October 2001, John McNamara, jmcnamara@cpan.org
#

use strict;
use Excel::Writer::XLSX;
use Excel::Writer::XLSX::Utility;

# Create a new workbook and add a worksheet
my $workbook  = Excel::Writer::XLSX->new( 'sales.xlsx' );
my $worksheet = $workbook->add_worksheet( 'May Sales' );


# Set up some formats
my %heading = (
    bold     => 1,
    pattern  => 1,
    fg_color => 19,
    border   => 1,
    align    => 'center',
);

my %total = (
    bold       => 1,
    top        => 1,
    num_format => '$#,##0.00'
);

my $heading      = $workbook->add_format( %heading );
my $total_format = $workbook->add_format( %total );
my $price_format = $workbook->add_format( num_format => '$#,##0.00' );
my $date_format  = $workbook->add_format( num_format => 'mmm d yyy' );


# Write the main headings
$worksheet->freeze_panes( 1 );    # Freeze the first row
$worksheet->write( 'A1', 'Item',     $heading );
$worksheet->write( 'B1', 'Quantity', $heading );
$worksheet->write( 'C1', 'Price',    $heading );
$worksheet->write( 'D1', 'Total',    $heading );
$worksheet->write( 'E1', 'Date',     $heading );

# Set the column widths
$worksheet->set_column( 'A:A', 25 );
$worksheet->set_column( 'B:B', 10 );
$worksheet->set_column( 'C:E', 16 );


# Extract the sales data from the __DATA__ section at the end of the file.
# In reality this information would probably come from a database
my @sales;

foreach my $line ( <DATA> ) {
    chomp $line;
    next if $line eq '';

    # Simple-minded processing of CSV data. Refer to the Text::CSV_XS
    # and Text::xSV modules for a more complete CSV handling.
    my @items = split /,/, $line;
    push @sales, \@items;
}


# Write out the items from each row
my $row = 1;
foreach my $sale ( @sales ) {

    $worksheet->write( $row, 0, @$sale[0] );
    $worksheet->write( $row, 1, @$sale[1] );
    $worksheet->write( $row, 2, @$sale[2], $price_format );

    # Create a formula like '=B2*C2'
    my $formula =
      '=' . xl_rowcol_to_cell( $row, 1 ) . "*" . xl_rowcol_to_cell( $row, 2 );

    $worksheet->write( $row, 3, $formula, $price_format );

    # Parse the date
    my $date = xl_decode_date_US( @$sale[3] );
    $worksheet->write( $row, 4, $date, $date_format );
    $row++;
}

# Create a formula to sum the totals, like '=SUM(D2:D6)'
my $total = '=SUM(D2:' . xl_rowcol_to_cell( $row - 1, 3 ) . ")";

$worksheet->write( $row, 3, $total, $total_format );


__DATA__
586 card,20,125.50,5/12/01
Flat Screen Monitor,1,1300.00,5/12/01
64 MB dimms,45,49.99,5/13/01
15 GB HD,12,300.00,5/13/01
Speakers (pair),5,15.50,5/14/01
Download this example: http://cpansearch.perl.org/src/JMCNAMARA/Excel-Writer-XLSX-0.05/examples/sales.pl
Example: stats_ext.pl
Example of formatting using the Excel::Writer::XLSX module
This is a simple example of how to use functions that reference cells in other worksheets within the same workbook.
Source code for this example:
#!/usr/bin/perl -w

###############################################################################
#
# Example of formatting using the Excel::Writer::XLSX module
#
# This is a simple example of how to use functions that reference cells in
# other worksheets within the same workbook.
#
# reverse('©'), March 2001, John McNamara, jmcnamara@cpan.org
#

use strict;
use Excel::Writer::XLSX;

# Create a new workbook and add a worksheet
my $workbook   = Excel::Writer::XLSX->new( 'stats_ext.xlsx' );
my $worksheet1 = $workbook->add_worksheet( 'Test results' );
my $worksheet2 = $workbook->add_worksheet( 'Data' );

# Set the column width for columns 1
$worksheet1->set_column( 'A:A', 20 );


# Create a format for the headings
my $heading = $workbook->add_format();
$heading->set_bold();

# Create a numerical format
my $numformat = $workbook->add_format();
$numformat->set_num_format( '0.00' );


# Write some statistical functions
$worksheet1->write( 'A1', 'Count', $heading );
$worksheet1->write( 'B1', '=COUNT(Data!B2:B9)' );

$worksheet1->write( 'A2', 'Sum', $heading );
$worksheet1->write( 'B2', '=SUM(Data!B2:B9)' );

$worksheet1->write( 'A3', 'Average', $heading );
$worksheet1->write( 'B3', '=AVERAGE(Data!B2:B9)' );

$worksheet1->write( 'A4', 'Min', $heading );
$worksheet1->write( 'B4', '=MIN(Data!B2:B9)' );

$worksheet1->write( 'A5', 'Max', $heading );
$worksheet1->write( 'B5', '=MAX(Data!B2:B9)' );

$worksheet1->write( 'A6', 'Standard Deviation', $heading );
$worksheet1->write( 'B6', '=STDEV(Data!B2:B9)' );

$worksheet1->write( 'A7', 'Kurtosis', $heading );
$worksheet1->write( 'B7', '=KURT(Data!B2:B9)' );


# Write the sample data
$worksheet2->write( 'A1', 'Sample', $heading );
$worksheet2->write( 'A2', 1 );
$worksheet2->write( 'A3', 2 );
$worksheet2->write( 'A4', 3 );
$worksheet2->write( 'A5', 4 );
$worksheet2->write( 'A6', 5 );
$worksheet2->write( 'A7', 6 );
$worksheet2->write( 'A8', 7 );
$worksheet2->write( 'A9', 8 );

$worksheet2->write( 'B1', 'Length', $heading );
$worksheet2->write( 'B2', 25.4,     $numformat );
$worksheet2->write( 'B3', 25.4,     $numformat );
$worksheet2->write( 'B4', 24.8,     $numformat );
$worksheet2->write( 'B5', 25.0,     $numformat );
$worksheet2->write( 'B6', 25.3,     $numformat );
$worksheet2->write( 'B7', 24.9,     $numformat );
$worksheet2->write( 'B8', 25.2,     $numformat );
$worksheet2->write( 'B9', 24.8,     $numformat );
Download this example: http://cpansearch.perl.org/src/JMCNAMARA/Excel-Writer-XLSX-0.05/examples/stats_ext.pl
Example: stocks.pl
Example of formatting using the Excel::Writer::XLSX module
This example shows how to use a conditional numerical format with colours to indicate if a share price has gone up or down.
Source code for this example:
#!/usr/bin/perl -w

###############################################################################
#
# Example of formatting using the Excel::Writer::XLSX module
#
# This example shows how to use a conditional numerical format
# with colours to indicate if a share price has gone up or down.
#
# reverse('©'), March 2001, John McNamara, jmcnamara@cpan.org
#

use strict;
use Excel::Writer::XLSX;

# Create a new workbook and add a worksheet
my $workbook  = Excel::Writer::XLSX->new( 'stocks.xlsx' );
my $worksheet = $workbook->add_worksheet();

# Set the column width for columns 1, 2, 3 and 4
$worksheet->set_column( 0, 3, 15 );


# Create a format for the column headings
my $header = $workbook->add_format();
$header->set_bold();
$header->set_size( 12 );
$header->set_color( 'blue' );


# Create a format for the stock price
my $f_price = $workbook->add_format();
$f_price->set_align( 'left' );
$f_price->set_num_format( '$0.00' );


# Create a format for the stock volume
my $f_volume = $workbook->add_format();
$f_volume->set_align( 'left' );
$f_volume->set_num_format( '#,##0' );


# Create a format for the price change. This is an example of a conditional
# format. The number is formatted as a percentage. If it is positive it is
# formatted in green, if it is negative it is formatted in red and if it is
# zero it is formatted as the default font colour (in this case black).
# Note: the [Green] format produces an unappealing lime green. Try
# [Color 10] instead for a dark green.
#
my $f_change = $workbook->add_format();
$f_change->set_align( 'left' );
$f_change->set_num_format( '[Green]0.0%;[Red]-0.0%;0.0%' );


# Write out the data
$worksheet->write( 0, 0, 'Company', $header );
$worksheet->write( 0, 1, 'Price',   $header );
$worksheet->write( 0, 2, 'Volume',  $header );
$worksheet->write( 0, 3, 'Change',  $header );

$worksheet->write( 1, 0, 'Damage Inc.' );
$worksheet->write( 1, 1, 30.25, $f_price );       # $30.25
$worksheet->write( 1, 2, 1234567, $f_volume );    # 1,234,567
$worksheet->write( 1, 3, 0.085, $f_change );      # 8.5% in green

$worksheet->write( 2, 0, 'Dump Corp.' );
$worksheet->write( 2, 1, 1.56, $f_price );        # $1.56
$worksheet->write( 2, 2, 7564, $f_volume );       # 7,564
$worksheet->write( 2, 3, -0.015, $f_change );     # -1.5% in red

$worksheet->write( 3, 0, 'Rev Ltd.' );
$worksheet->write( 3, 1, 0.13, $f_price );        # $0.13
$worksheet->write( 3, 2, 321, $f_volume );        # 321
$worksheet->write( 3, 3, 0, $f_change );          # 0 in the font color (black)
Download this example: http://cpansearch.perl.org/src/JMCNAMARA/Excel-Writer-XLSX-0.05/examples/stocks.pl
Example: write_handler1.pl
Example of how to add a user defined data handler to the Excel::Writer::XLSX write() method.
The following example shows how to add a handler for a 7 digit ID number.
Source code for this example:
#!/usr/bin/perl -w

###############################################################################
#
# Example of how to add a user defined data handler to the
# Excel::Writer::XLSX write() method.
#
# The following example shows how to add a handler for a 7 digit ID number.
#
#
# reverse('©'), September 2004, John McNamara, jmcnamara@cpan.org
#

use strict;
use Excel::Writer::XLSX;


my $workbook  = Excel::Writer::XLSX->new( 'write_handler1.xlsx' );
my $worksheet = $workbook->add_worksheet();


###############################################################################
#
# Add a handler for 7 digit id numbers. This is useful when you want a string
# such as 0000001 written as a string instead of a number and thus preserve
# the leading zeroes.
#
# Note: you can get the same effect using the keep_leading_zeros() method but
# this serves as a simple example.
#
$worksheet->add_write_handler( qr[^\d{7}$], \&write_my_id );


###############################################################################
#
# The following function processes the data when a match is found.
#
sub write_my_id {

    my $worksheet = shift;

    return $worksheet->write_string( @_ );
}


# This format maintains the cell as text even if it is edited.
my $id_format = $workbook->add_format( num_format => '@' );


# Write some numbers in the user defined format
$worksheet->write( 'A1', '0000000', $id_format );
$worksheet->write( 'A2', '0000001', $id_format );
$worksheet->write( 'A3', '0004000', $id_format );
$worksheet->write( 'A4', '1234567', $id_format );

# Write some numbers that don't match the defined format
$worksheet->write( 'A6', '000000', $id_format );
$worksheet->write( 'A7', '000001', $id_format );
$worksheet->write( 'A8', '004000', $id_format );
$worksheet->write( 'A9', '123456', $id_format );


__END__
Download this example: http://cpansearch.perl.org/src/JMCNAMARA/Excel-Writer-XLSX-0.05/examples/write_handler1.pl
Example: write_handler2.pl
Example of how to add a user defined data handler to the Excel::Writer::XLSX write() method.
The following example shows how to add a handler for a 7 digit ID number. It adds an additional constraint to the write_handler1.pl in that it only filters data that isn't in the third column.
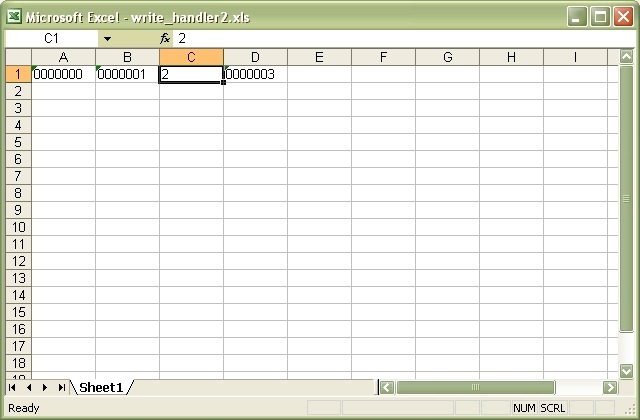
Source code for this example:
#!/usr/bin/perl -w

###############################################################################
#
# Example of how to add a user defined data handler to the
# Excel::Writer::XLSX write() method.
#
# The following example shows how to add a handler for a 7 digit ID number.
# It adds an additional constraint to the write_handler1.pl in that it only
# filters data that isn't in the third column.
#
#
# reverse('©'), September 2004, John McNamara, jmcnamara@cpan.org
#

use strict;
use Excel::Writer::XLSX;


my $workbook  = Excel::Writer::XLSX->new( 'write_handler2.xlsx' );
my $worksheet = $workbook->add_worksheet();


###############################################################################
#
# Add a handler for 7 digit id numbers. This is useful when you want a string
# such as 0000001 written as a string instead of a number and thus preserve
# the leading zeroes.
#
# Note: you can get the same effect using the keep_leading_zeros() method but
# this serves as a simple example.
#
$worksheet->add_write_handler( qr[^\d{7}$], \&write_my_id );


###############################################################################
#
# The following function processes the data when a match is found. The handler
# is set up so that it only filters data if it is in the third column.
#
sub write_my_id {

    my $worksheet = shift;
    my $col       = $_[1];

    # col is zero based
    if ( $col != 2 ) {
        return $worksheet->write_string( @_ );
    }
    else {

        # Reject the match and return control to write()
        return undef;
    }

}


# This format maintains the cell as text even if it is edited.
my $id_format = $workbook->add_format( num_format => '@' );


# Write some numbers in the user defined format
$worksheet->write( 'A1', '0000000', $id_format );
$worksheet->write( 'B1', '0000001', $id_format );
$worksheet->write( 'C1', '0000002', $id_format );
$worksheet->write( 'D1', '0000003', $id_format );


__END__
Download this example: http://cpansearch.perl.org/src/JMCNAMARA/Excel-Writer-XLSX-0.05/examples/write_handler2.pl
Example: write_handler3.pl
Example of how to add a user defined data handler to the Excel::Writer::XLSX write() method.
The following example shows how to add a handler for dates in a specific format.
See write_handler4.pl for a more rigorous example with error handling.
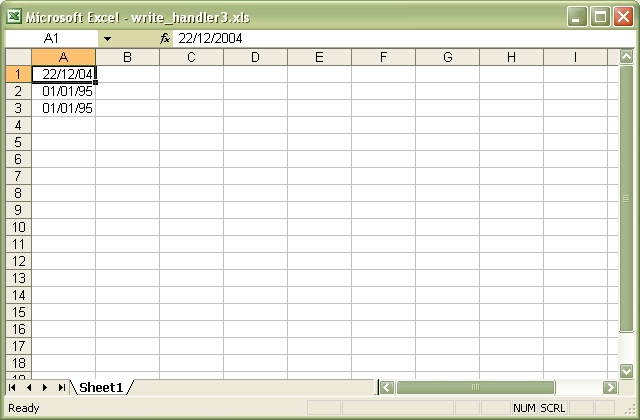
Source code for this example:
#!/usr/bin/perl -w

###############################################################################
#
# Example of how to add a user defined data handler to the
# Excel::Writer::XLSX write() method.
#
# The following example shows how to add a handler for dates in a specific
# format.
#
# See write_handler4.pl for a more rigorous example with error handling.
#
# reverse('©'), September 2004, John McNamara, jmcnamara@cpan.org
#

use strict;
use Excel::Writer::XLSX;


my $workbook    = Excel::Writer::XLSX->new( 'write_handler3.xlsx' );
my $worksheet   = $workbook->add_worksheet();
my $date_format = $workbook->add_format( num_format => 'dd/mm/yy' );


###############################################################################
#
# Add a handler to match dates in the following format: d/m/yyyy
#
# The day and month can be single or double digits.
#
$worksheet->add_write_handler( qr[^\d{1,2}/\d{1,2}/\d{4}$], \&write_my_date );


###############################################################################
#
# The following function processes the data when a match is found.
# See write_handler4.pl for a more rigorous example with error handling.
#
sub write_my_date {

    my $worksheet = shift;
    my @args      = @_;

    my $token = $args[2];
    $token =~ qr[^(\d{1,2})/(\d{1,2})/(\d{4})$];

    # Change to the date format required by write_date_time().
    my $date = sprintf "%4d-%02d-%02dT", $3, $2, $1;

    $args[2] = $date;

    return $worksheet->write_date_time( @args );
}


# Write some dates in the user defined format
$worksheet->write( 'A1', '22/12/2004', $date_format );
$worksheet->write( 'A2', '1/1/1995',   $date_format );
$worksheet->write( 'A3', '01/01/1995', $date_format );


__END__
Download this example: http://cpansearch.perl.org/src/JMCNAMARA/Excel-Writer-XLSX-0.05/examples/write_handler3.pl
Example: write_handler4.pl
Example of how to add a user defined data handler to the Excel::Writer::XLSX write() method.
The following example shows how to add a handler for dates in a specific format.
This is a more rigorous version of write_handler3.pl.
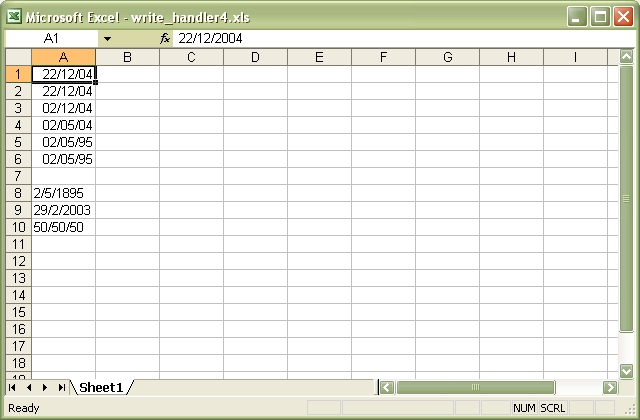
Source code for this example:
#!/usr/bin/perl -w

###############################################################################
#
# Example of how to add a user defined data handler to the
# Excel::Writer::XLSX write() method.
#
# The following example shows how to add a handler for dates in a specific
# format.
#
# This is a more rigorous version of write_handler3.pl.
#
# reverse('©'), September 2004, John McNamara, jmcnamara@cpan.org
#

use strict;
use Excel::Writer::XLSX;


my $workbook    = Excel::Writer::XLSX->new( 'write_handler4.xlsx' );
my $worksheet   = $workbook->add_worksheet();
my $date_format = $workbook->add_format( num_format => 'dd/mm/yy' );


###############################################################################
#
# Add a handler to match dates in the following formats: d/m/yy, d/m/yyyy
#
# The day and month can be single or double digits and the year can be  2 or 4
# digits.
#
$worksheet->add_write_handler( qr[^\d{1,2}/\d{1,2}/\d{2,4}$], \&write_my_date );


###############################################################################
#
# The following function processes the data when a match is found.
#
sub write_my_date {

    my $worksheet = shift;
    my @args      = @_;

    my $token = $args[2];

    if ( $token =~ qr[^(\d{1,2})/(\d{1,2})/(\d{2,4})$] ) {

        my $day  = $1;
        my $mon  = $2;
        my $year = $3;

        # Use a window for 2 digit dates. This will keep some ragged Perl
        # programmer employed in thirty years time. :-)
        if ( length $year == 2 ) {
            if ( $year < 50 ) {
                $year += 2000;
            }
            else {
                $year += 1900;
            }
        }

        my $date = sprintf "%4d-%02d-%02dT", $year, $mon, $day;

        # Convert the ISO ISO8601 style string to an Excel date
        $date = $worksheet->convert_date_time( $date );

        if ( defined $date ) {

            # Date was valid
            $args[2] = $date;
            return $worksheet->write_number( @args );
        }
        else {

            # Not a valid date therefore write as a string
            return $worksheet->write_string( @args );
        }
    }
    else {

        # Shouldn't happen if the same match is used in the re and sub.
        return undef;
    }
}


# Write some dates in the user defined format
$worksheet->write( 'A1', '22/12/2004', $date_format );
$worksheet->write( 'A2', '22/12/04',   $date_format );
$worksheet->write( 'A3', '2/12/04',    $date_format );
$worksheet->write( 'A4', '2/5/04',     $date_format );
$worksheet->write( 'A5', '2/5/95',     $date_format );
$worksheet->write( 'A6', '2/5/1995',   $date_format );

# Some erroneous dates
$worksheet->write( 'A8', '2/5/1895',  $date_format ); # Date out of Excel range
$worksheet->write( 'A9', '29/2/2003', $date_format ); # Invalid leap day
$worksheet->write( 'A10', '50/50/50', $date_format ); # Matches but isn't a date


__END__
Download this example: http://cpansearch.perl.org/src/JMCNAMARA/Excel-Writer-XLSX-0.05/examples/write_handler4.pl
Example: unicode_2022_jp.pl
A simple example of converting some Unicode text to an Excel file using Excel::Writer::XLSX.
This example generates some Japanese from a file with ISO-2022-JP encoded text.
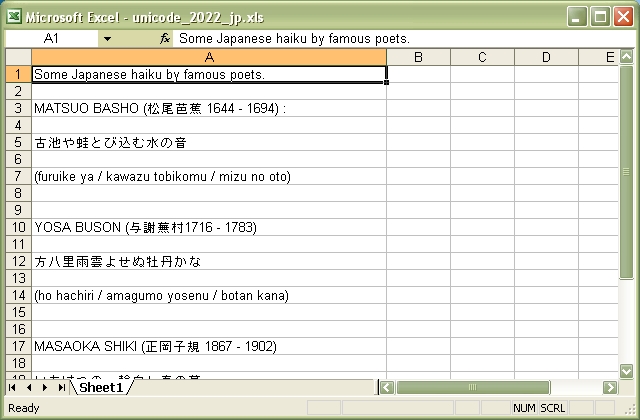
Source code for this example:
#!/usr/bin/perl

##############################################################################
#
# A simple example of converting some Unicode text to an Excel file using
# Excel::Writer::XLSX.
#
# This example generates some Japanese from a file with ISO-2022-JP
# encoded text.
#
# reverse('©'), September 2004, John McNamara, jmcnamara@cpan.org
#

use strict;
use warnings;
use Excel::Writer::XLSX;


my $workbook = Excel::Writer::XLSX->new( 'unicode_2022_jp.xlsx' );

die "Couldn't create new Excel file: $!.\n" unless defined $workbook;

my $worksheet = $workbook->add_worksheet();
$worksheet->set_column( 'A:A', 50 );


my $file = 'unicode_2022_jp.txt';

open FH, '<:encoding(iso-2022-jp)', $file or die "Couldn't open $file: $!\n";

my $row = 0;

while ( <FH> ) {
    next if /^#/;    # Ignore the comments in the sample file.
    chomp;
    $worksheet->write( $row++, 0, $_ );
}


__END__
Download this example: http://cpansearch.perl.org/src/JMCNAMARA/Excel-Writer-XLSX-0.05/examples/unicode_2022_jp.pl
Example: unicode_8859_11.pl
A simple example of converting some Unicode text to an Excel file using Excel::Writer::XLSX.
This example generates some Thai from a file with ISO-8859-11 encoded text.
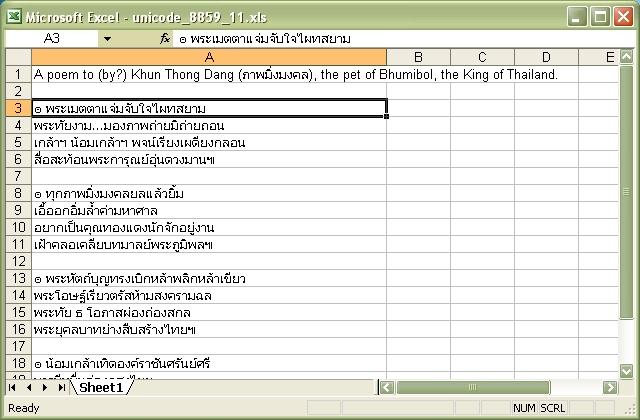
Source code for this example:
#!/usr/bin/perl

##############################################################################
#
# A simple example of converting some Unicode text to an Excel file using
# Excel::Writer::XLSX.
#
# This example generates some Thai from a file with ISO-8859-11 encoded text.
#
#
# reverse('©'), September 2004, John McNamara, jmcnamara@cpan.org
#

use strict;
use warnings;
use Excel::Writer::XLSX;


my $workbook = Excel::Writer::XLSX->new( 'unicode_8859_11.xlsx' );

die "Couldn't create new Excel file: $!.\n" unless defined $workbook;

my $worksheet = $workbook->add_worksheet();
$worksheet->set_column( 'A:A', 50 );


my $file = 'unicode_8859_11.txt';

open FH, '<:encoding(iso-8859-11)', $file or die "Couldn't open $file: $!\n";

my $row = 0;

while ( <FH> ) {
    next if /^#/;    # Ignore the comments in the sample file.
    chomp;
    $worksheet->write( $row++, 0, $_ );
}


__END__
Download this example: http://cpansearch.perl.org/src/JMCNAMARA/Excel-Writer-XLSX-0.05/examples/unicode_8859_11.pl
Example: unicode_8859_7.pl
A simple example of converting some Unicode text to an Excel file using Excel::Writer::XLSX.
This example generates some Greek from a file with ISO-8859-7 encoded text.
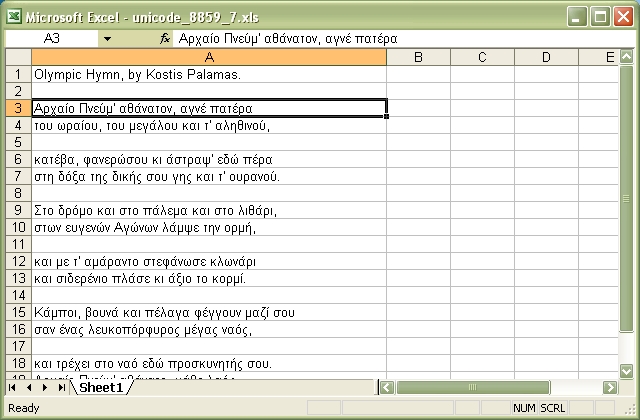
Source code for this example:
#!/usr/bin/perl

##############################################################################
#
# A simple example of converting some Unicode text to an Excel file using
# Excel::Writer::XLSX.
#
# This example generates some Greek from a file with ISO-8859-7 encoded text.
#
#
# reverse('©'), September 2004, John McNamara, jmcnamara@cpan.org
#

use strict;
use warnings;
use Excel::Writer::XLSX;


my $workbook = Excel::Writer::XLSX->new( 'unicode_8859_7.xlsx' );

die "Couldn't create new Excel file: $!.\n" unless defined $workbook;

my $worksheet = $workbook->add_worksheet();
$worksheet->set_column( 'A:A', 50 );


my $file = 'unicode_8859_7.txt';

open FH, '<:encoding(iso-8859-7)', $file or die "Couldn't open $file: $!\n";

my $row = 0;

while ( <FH> ) {
    next if /^#/;    # Ignore the comments in the sample file.
    chomp;
    $worksheet->write( $row++, 0, $_ );
}


__END__
Download this example: http://cpansearch.perl.org/src/JMCNAMARA/Excel-Writer-XLSX-0.05/examples/unicode_8859_7.pl
Example: unicode_big5.pl
A simple example of converting some Unicode text to an Excel file using Excel::Writer::XLSX.
This example generates some Chinese from a file with BIG5 encoded text.
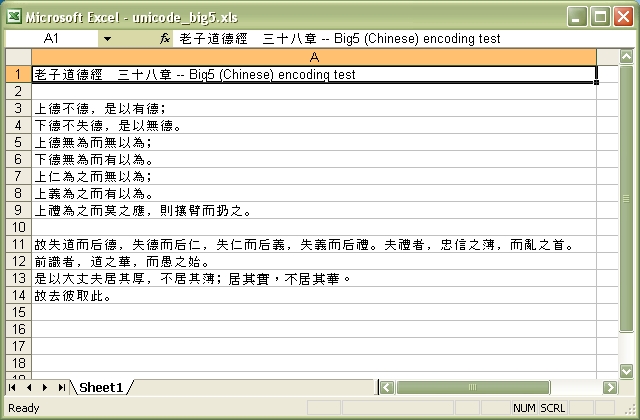
Source code for this example:
#!/usr/bin/perl

##############################################################################
#
# A simple example of converting some Unicode text to an Excel file using
# Excel::Writer::XLSX.
#
# This example generates some Chinese from a file with BIG5 encoded text.
#
#
# reverse('©'), September 2004, John McNamara, jmcnamara@cpan.org
#

use strict;
use warnings;
use Excel::Writer::XLSX;


my $workbook = Excel::Writer::XLSX->new( 'unicode_big5.xlsx' );

die "Couldn't create new Excel file: $!.\n" unless defined $workbook;

my $worksheet = $workbook->add_worksheet();
$worksheet->set_column( 'A:A', 80 );


my $file = 'unicode_big5.txt';

open FH, '<:encoding(big5)', $file or die "Couldn't open $file: $!\n";

my $row = 0;

while ( <FH> ) {
    next if /^#/;    # Ignore the comments in the sample file.
    chomp;
    $worksheet->write( $row++, 0, $_ );
}


__END__
Download this example: http://cpansearch.perl.org/src/JMCNAMARA/Excel-Writer-XLSX-0.05/examples/unicode_big5.pl
Example: unicode_cp1251.pl
A simple example of converting some Unicode text to an Excel file using Excel::Writer::XLSX.
This example generates some Russian from a file with CP1251 encoded text.
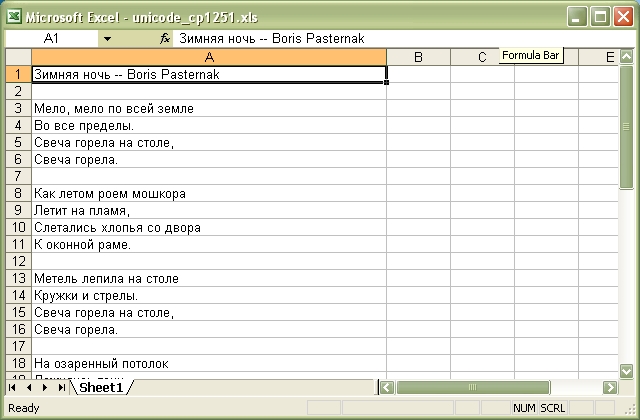
Source code for this example:
#!/usr/bin/perl

##############################################################################
#
# A simple example of converting some Unicode text to an Excel file using
# Excel::Writer::XLSX.
#
# This example generates some Russian from a file with CP1251 encoded text.
#
#
# reverse('©'), September 2004, John McNamara, jmcnamara@cpan.org
#

use strict;
use warnings;
use Excel::Writer::XLSX;


my $workbook = Excel::Writer::XLSX->new( 'unicode_cp1251.xlsx' );

die "Couldn't create new Excel file: $!.\n" unless defined $workbook;

my $worksheet = $workbook->add_worksheet();
$worksheet->set_column( 'A:A', 50 );


my $file = 'unicode_cp1251.txt';

open FH, '<:encoding(cp1251)', $file or die "Couldn't open $file: $!\n";

my $row = 0;

while ( <FH> ) {
    next if /^#/;    # Ignore the comments in the sample file.
    chomp;
    $worksheet->write( $row++, 0, $_ );
}


__END__
Download this example: http://cpansearch.perl.org/src/JMCNAMARA/Excel-Writer-XLSX-0.05/examples/unicode_cp1251.pl
Example: unicode_cp1256.pl
A simple example of converting some Unicode text to an Excel file using Excel::Writer::XLSX.
This example generates some Arabic text from a CP-1256 encoded file.
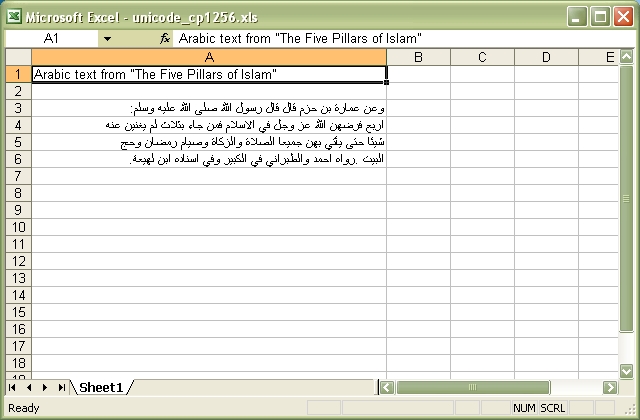
Source code for this example:
#!/usr/bin/perl

##############################################################################
#
# A simple example of converting some Unicode text to an Excel file using
# Excel::Writer::XLSX.
#
# This example generates some Arabic text from a CP-1256 encoded file.
#
#
# reverse('©'), September 2004, John McNamara, jmcnamara@cpan.org
#

use strict;
use warnings;
use Excel::Writer::XLSX;


my $workbook = Excel::Writer::XLSX->new( 'unicode_cp1256.xlsx' );

die "Couldn't create new Excel file: $!.\n" unless defined $workbook;

my $worksheet = $workbook->add_worksheet();
$worksheet->set_column( 'A:A', 50 );


my $file = 'unicode_cp1256.txt';

open FH, '<:encoding(cp1256)', $file or die "Couldn't open $file: $!\n";

my $row = 0;

while ( <FH> ) {
    next if /^#/;    # Ignore the comments in the sample file.
    chomp;
    $worksheet->write( $row++, 0, $_ );
}


__END__
Download this example: http://cpansearch.perl.org/src/JMCNAMARA/Excel-Writer-XLSX-0.05/examples/unicode_cp1256.pl
Example: unicode_cyrillic.pl
A simple example of writing some Russian cyrillic text using Excel::Writer::XLSX.
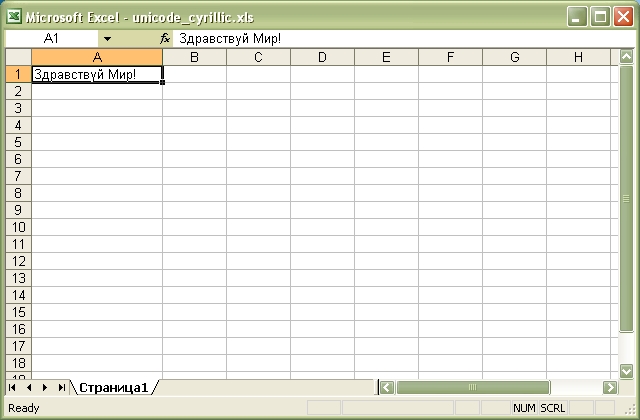
Source code for this example:
#!/usr/bin/perl

##############################################################################
#
# A simple example of writing some Russian cyrillic text using
# Excel::Writer::XLSX.
#
#
#
#
# reverse('©'), March 2005, John McNamara, jmcnamara@cpan.org
#

use strict;
use warnings;
use Excel::Writer::XLSX;


# In this example we generate utf8 strings from character data but in a
# real application we would expect them to come from an external source.
#


# Create a Russian worksheet name in utf8.
my $sheet = pack "U*", 0x0421, 0x0442, 0x0440, 0x0430, 0x043D, 0x0438,
  0x0446, 0x0430;


# Create a Russian string.
my $str = pack "U*", 0x0417, 0x0434, 0x0440, 0x0430, 0x0432, 0x0441,
  0x0442, 0x0432, 0x0443, 0x0439, 0x0020, 0x041C,
  0x0438, 0x0440, 0x0021;


my $workbook = Excel::Writer::XLSX->new( 'unicode_cyrillic.xlsx' );

die "Couldn't create new Excel file: $!.\n" unless defined $workbook;

my $worksheet = $workbook->add_worksheet( $sheet . '1' );

$worksheet->set_column( 'A:A', 18 );
$worksheet->write( 'A1', $str );


__END__
Download this example: http://cpansearch.perl.org/src/JMCNAMARA/Excel-Writer-XLSX-0.05/examples/unicode_cyrillic.pl
Example: unicode_koi8r.pl
A simple example of converting some Unicode text to an Excel file using Excel::Writer::XLSX.
This example generates some Russian from a file with KOI8-R encoded text.
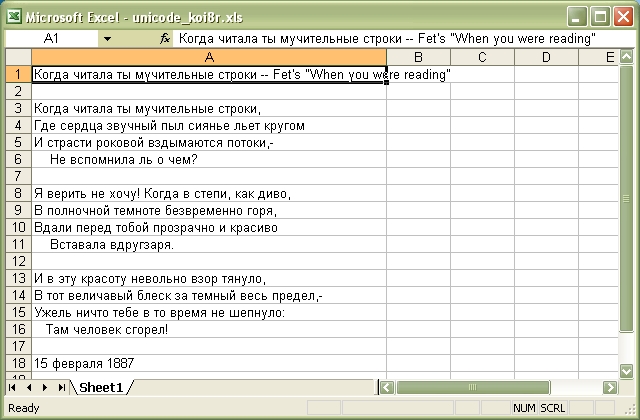
Source code for this example:
#!/usr/bin/perl

##############################################################################
#
# A simple example of converting some Unicode text to an Excel file using
# Excel::Writer::XLSX.
#
# This example generates some Russian from a file with KOI8-R encoded text.
#
#
# reverse('©'), September 2004, John McNamara, jmcnamara@cpan.org
#

use strict;
use warnings;
use Excel::Writer::XLSX;


my $workbook = Excel::Writer::XLSX->new( 'unicode_koi8r.xlsx' );

die "Couldn't create new Excel file: $!.\n" unless defined $workbook;

my $worksheet = $workbook->add_worksheet();
$worksheet->set_column( 'A:A', 50 );


my $file = 'unicode_koi8r.txt';

open FH, '<:encoding(koi8-r)', $file or die "Couldn't open $file: $!\n";

my $row = 0;

while ( <FH> ) {
    next if /^#/;    # Ignore the comments in the sample file.
    chomp;
    $worksheet->write( $row++, 0, $_ );
}


__END__
Download this example: http://cpansearch.perl.org/src/JMCNAMARA/Excel-Writer-XLSX-0.05/examples/unicode_koi8r.pl
Example: unicode_polish_utf8.pl
A simple example of converting some Unicode text to an Excel file using Excel::Writer::XLSX.
This example generates some Polish from a file with UTF8 encoded text.
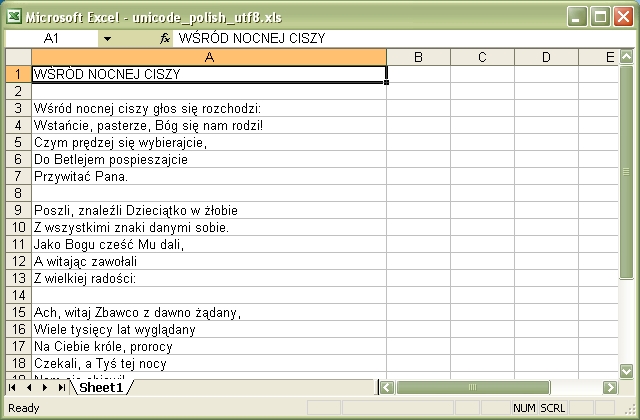
Source code for this example:
#!/usr/bin/perl

##############################################################################
#
# A simple example of converting some Unicode text to an Excel file using
# Excel::Writer::XLSX.
#
# This example generates some Polish from a file with UTF8 encoded text.
#
#
# reverse('©'), September 2004, John McNamara, jmcnamara@cpan.org
#

use strict;
use warnings;
use Excel::Writer::XLSX;


my $workbook = Excel::Writer::XLSX->new( 'unicode_polish_utf8.xlsx' );

die "Couldn't create new Excel file: $!.\n" unless defined $workbook;

my $worksheet = $workbook->add_worksheet();
$worksheet->set_column( 'A:A', 50 );


my $file = 'unicode_polish_utf8.txt';

open FH, '<:encoding(utf8)', $file or die "Couldn't open $file: $!\n";

my $row = 0;

while ( <FH> ) {
    next if /^#/;    # Ignore the comments in the sample file.
    chomp;
    $worksheet->write( $row++, 0, $_ );
}


__END__
Download this example: http://cpansearch.perl.org/src/JMCNAMARA/Excel-Writer-XLSX-0.05/examples/unicode_polish_utf8.pl
Example: unicode_shift_jis.pl
A simple example of converting some Unicode text to an Excel file using Excel::Writer::XLSX.
This example generates some Japenese text from a file with Shift-JIS encoded text.
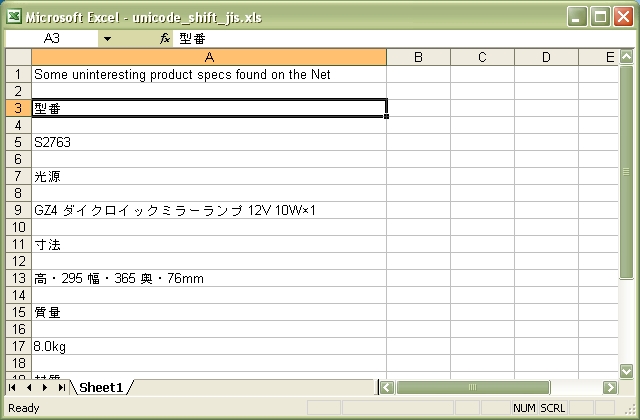
Source code for this example:
#!/usr/bin/perl

##############################################################################
#
# A simple example of converting some Unicode text to an Excel file using
# Excel::Writer::XLSX.
#
# This example generates some Japenese text from a file with Shift-JIS
# encoded text.
#
# reverse('©'), September 2004, John McNamara, jmcnamara@cpan.org
#

use strict;
use warnings;
use Excel::Writer::XLSX;


my $workbook = Excel::Writer::XLSX->new( 'unicode_shift_jis.xlsx' );

die "Couldn't create new Excel file: $!.\n" unless defined $workbook;

my $worksheet = $workbook->add_worksheet();
$worksheet->set_column( 'A:A', 50 );


my $file = 'unicode_shift_jis.txt';

open FH, '<:encoding(shiftjis)', $file or die "Couldn't open $file: $!\n";

my $row = 0;

while ( <FH> ) {
    next if /^#/;    # Ignore the comments in the sample file.
    chomp;
    $worksheet->write( $row++, 0, $_ );
}


__END__
Download this example: http://cpansearch.perl.org/src/JMCNAMARA/Excel-Writer-XLSX-0.05/examples/unicode_shift_jis.pl
AUTHOR
John McNamara jmcnamara@cpan.org
Contributed examples contain the original author's name.
COPYRIGHT
Copyright MM-MMXI, John McNamara.
All Rights Reserved. This module is free software. It may be used, redistributed and/or modified under the same terms as Perl itself.
1 POD Error
The following errors were encountered while parsing the POD:
- Around line 144:
Non-ASCII character seen before =encoding in 'reverse('©'),'. Assuming CP1252